Get Your Front Desk Circool-Ready
Before school starts, take a few minutes to make sure Circool, your printer, your webcam, and your school settings are ready.
This guide walks your front desk team through the quick checks we recommend before guests and students return for the new school year.
What you’ll check
Use this guide to confirm:
- You are viewing the correct school
- Your badge printer is connected and printing
- Your webcam is working
- Your destinations are accurate
- Your alert contacts are correct
- Your student check-in and check-out settings are ready, if your school uses those features
Tip: This is a great back-to-school checklist to run before registration, open house, or the first day students return.
Step 1: Select your school
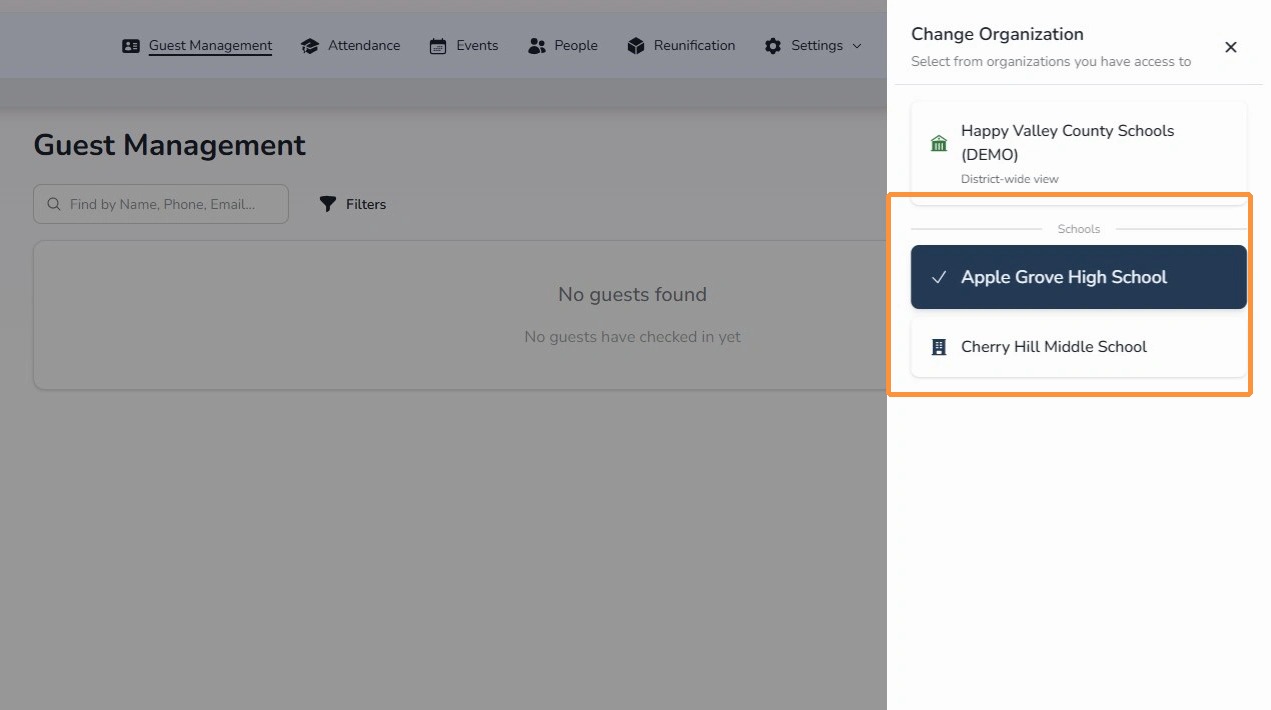
First, make sure you are viewing the correct school.
- Look in the top-right corner of Circool.
- Click the school name.
- Select the school you want to manage.
Step 2: Restart and check your badge printer
Tip: Let’s make sure your name badge printer is powered on, connected, and ready to print.
- Restart the printer by holding the power button until it turns off.
- Press and hold the power button again to turn it back on.
- Wait about 30 seconds.
- Confirm you see two green lights.
Good to know: If the far-right light with the network icon is not green, the printer is likely not connected to Wi-Fi. Please contact your school’s IT team.
Step 3: Select your printer in Circool
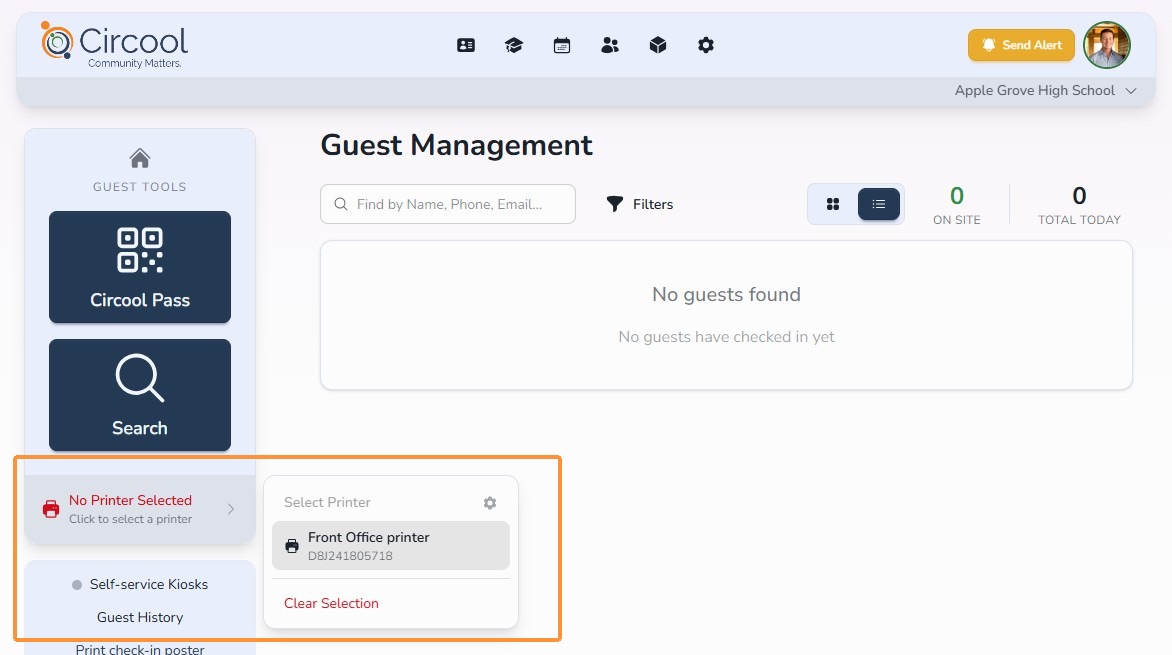
Back in Circool, go to Guest Management and select the printer your front desk will use.
- From the left panel, look for the printer selection area.
- If you see No Printer Selected, click the arrow.
- Select the name badge printer you normally use.
Step 4: Run a test print
The easiest way to test the printer is to check in a test guest and confirm that a badge prints.
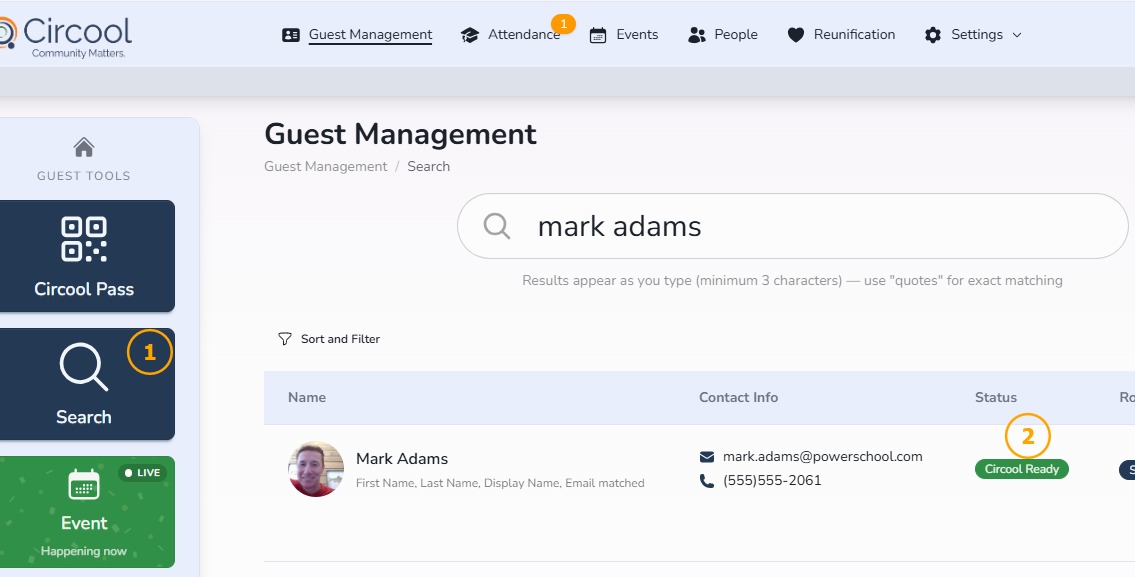
- From Guest Management, click Search.
- Search for a parent or guardian you know.
- Choose someone marked Circool Ready.
- Click the person’s name.
- Select a Destination.
- Click Check In.
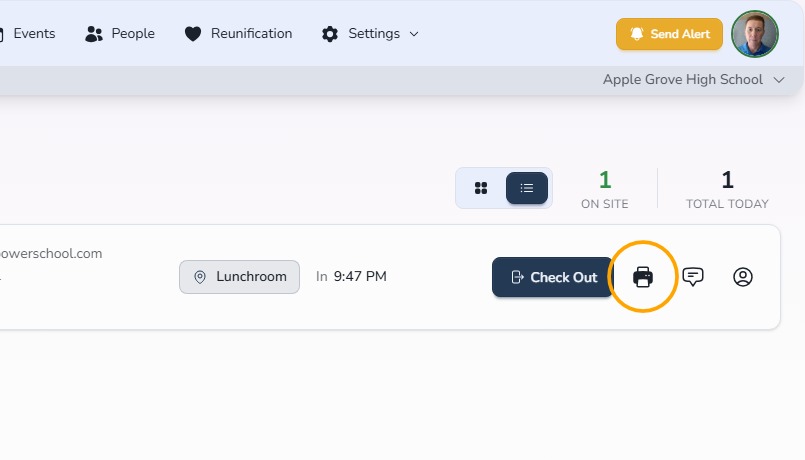
If the name badge prints, you are all set. If you have multiple printers, switch printers and repeat the test for each one.
If the badge does not print: Try clicking the Reprint Badge icon for the person you checked in. If it still does not print, continue to the next step.
Step 5: Restart and calibrate the printer in Circool
If the badge did not print, restart and calibrate the printer from Circool.
- Click Settings.
- Click Hardware.
- Click Label Printers.
- Under Actions, click Restart.
- After the printer restarts, click Calibrate. The printer should feed a few blank labels.
- Go back to Guest Management and run another test check-in.
Step 6: Test your webcam
Tip: Let’s make sure your webcam is working before guests arrive.
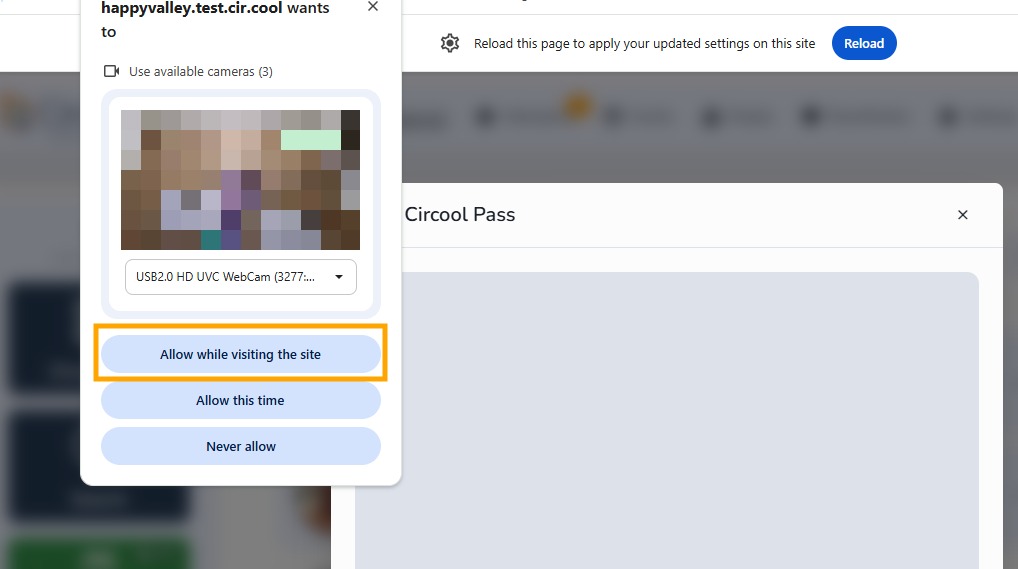
- From Guest Management, click Circool Pass.
- If your browser asks for permission to use the camera, select Allow while visiting this site.
- Confirm the camera turns on and is ready to scan a guest’s Circool Pass.
- If the camera turns on, you are all set. You do not need to scan a real Circool Pass.
Step 7: Review your School-specific settings
Tip: All of your settings are the same, but it is still smart to review them before school starts.
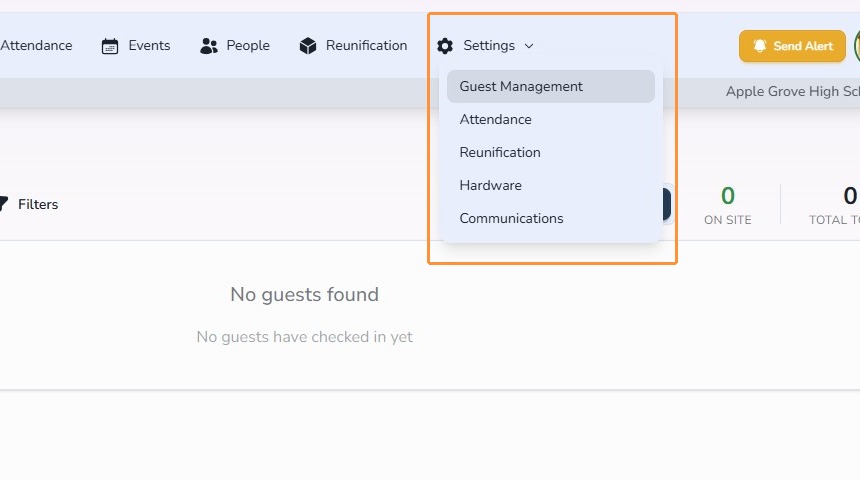
- Click Settings.
- Select Guest Management from the dropdown menu.
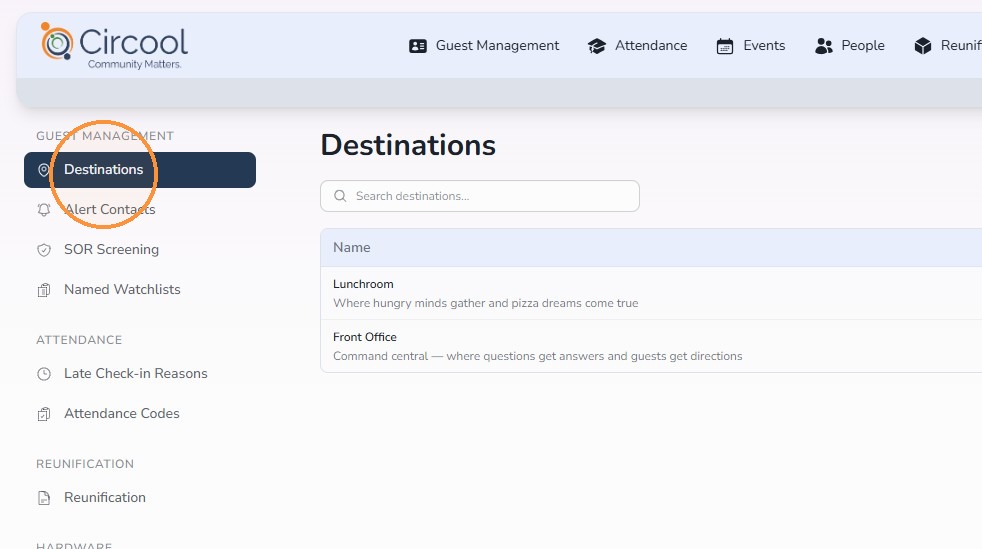
Step 8: Review destinations
Destinations are the options your team selects when a guest checks in and says where they are going.
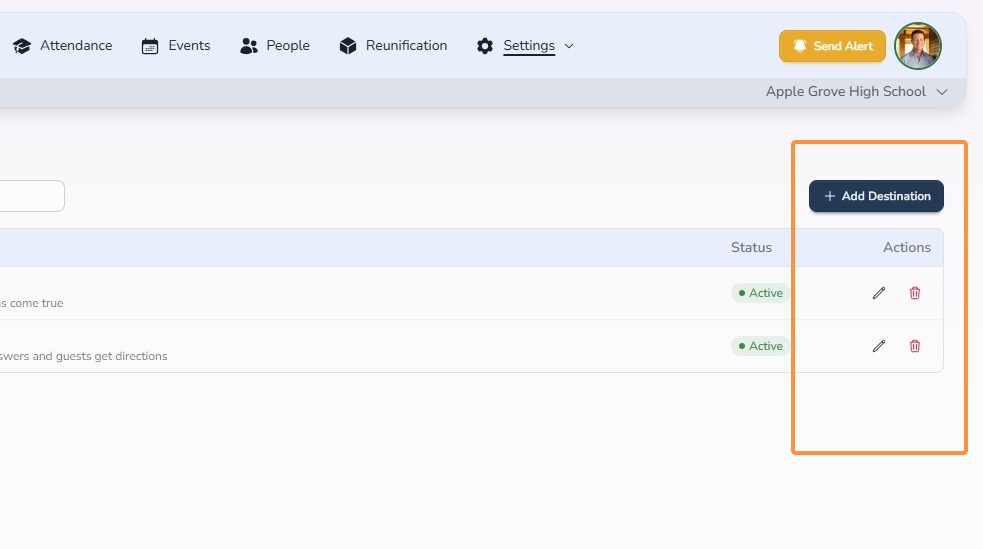
Review this list and use the buttons on the right to add, change, or remove a destination if needed.
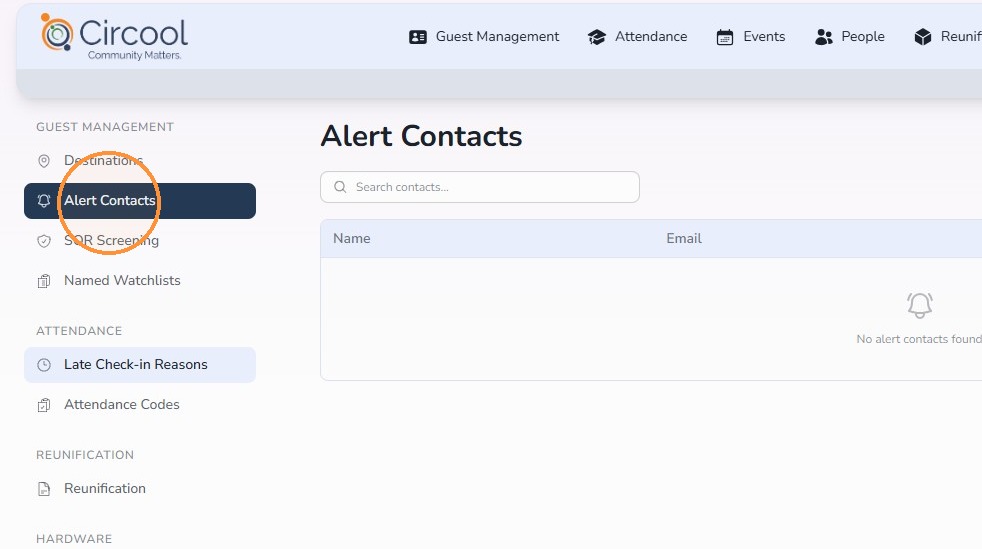
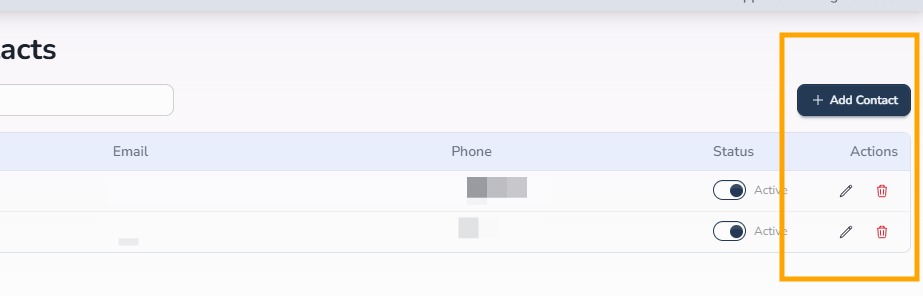
Step 9: Review alert contacts
Alert Contacts are the staff members who receive a text message and email when the Send Alert button is used.
If no one is listed, add your school admin team and SRO, if applicable. Use the buttons on the right to add, change, or remove alert contacts.
Step 10: Review late check-in and early check-out reasons
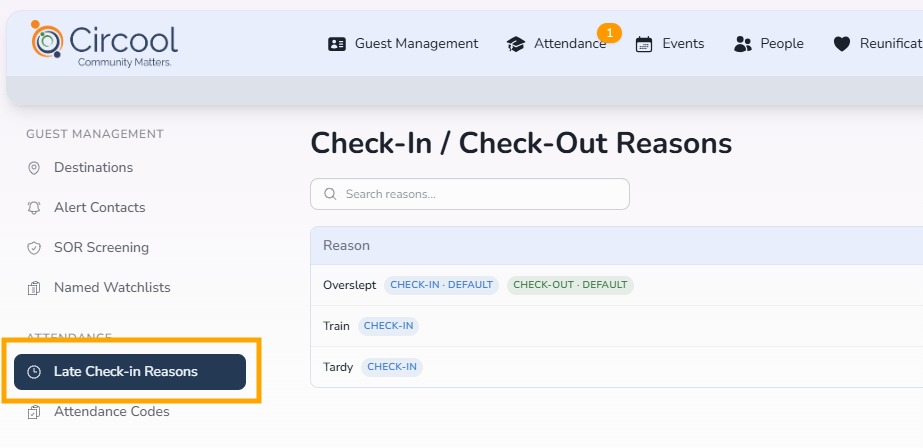
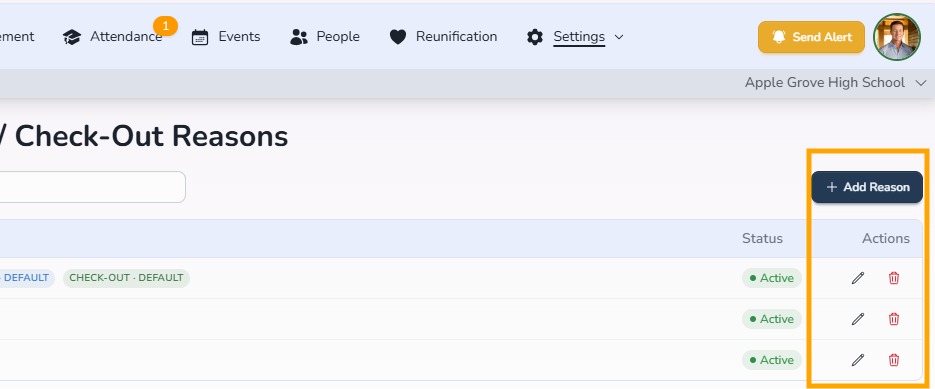
If your school uses Circool to log tardies or early check-outs to PowerSchool, review your Late Check-In Reasons.
These are the internal reason options staff select when students check in late or check out early. This list is separate from the PowerSchool attendance codes.
Use the buttons on the right to add, change, or remove a check-in or check-out reason.
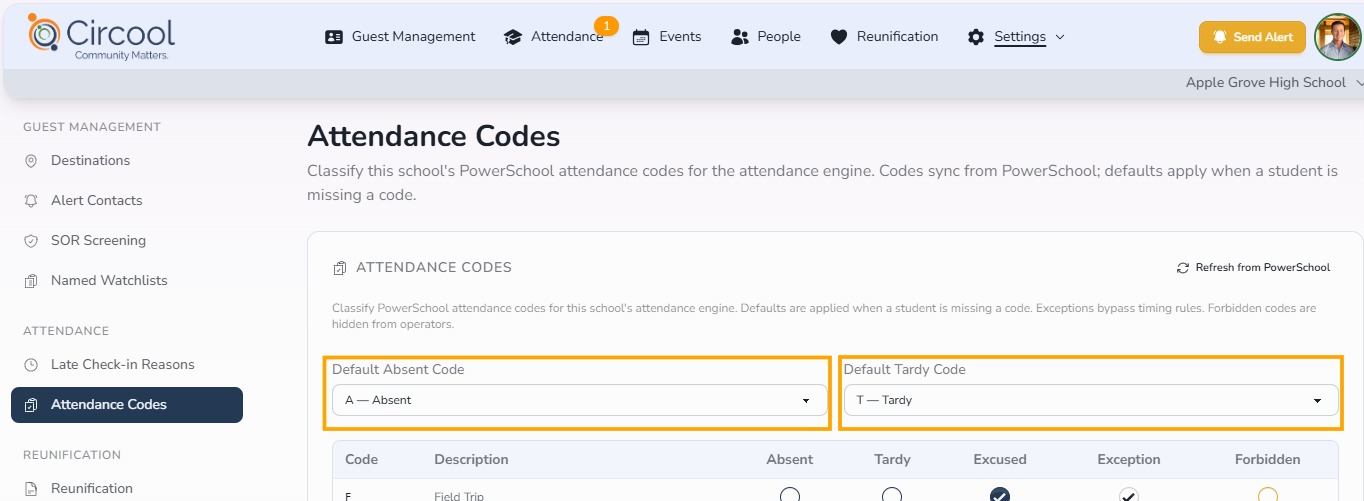
Step 11: Review attendance codes
If your school uses Circool to send tardies or early check-outs to PowerSchool, review your Attendance Codes.
These settings map Circool’s student check-in and check-out activity to the correct PowerSchool attendance codes.
- Under Default Absent Code, choose Unexcused Absence.
- Under Default Tardy Code, choose Tardy Unexcused.
What happens next
Once these checks are complete, your front desk is ready to use Circool for the new school year.
Continue through the other training guides to review guest check-in, guest check-out, self-service kiosks, student check-in/check-out, and other Circool workflows.
That’s it. Thank you for everything you do to keep your front office moving and your school day running smoothly.
Need help?
Circool support is here to help.
If you need help getting your front desk Circool-ready, contact Circool support by phone at 205.202.1124 or email support@circool.com.
Was this article helpful?
That’s Great!
Thank you for your feedback
Sorry! We couldn't be helpful
Thank you for your feedback
Feedback sent
We appreciate your effort and will try to fix the article