How to Manually Register a New Guest with a Webcam
Use this guide when a guest does not have Circool, does not have access to their phone, or needs to be manually registered from the front desk.
This guide walks through creating and validating a new guest using a webcam, the guest’s ID, and a profile photo.
Before you start
Use this process when the guest cannot scan the check-in poster from their own phone and does not already have a Circool Pass ready.
This may happen when:
- The guest does not have their phone with them
- The guest cannot access their Circool account
- The guest is visiting for the first time
- The front desk needs to manually capture the guest’s ID and photo
Tip: Make sure your webcam is connected and allowed in your browser before starting this process.
Step 1: Open Search
- Go to the Guest Management tab.
- Click Search.
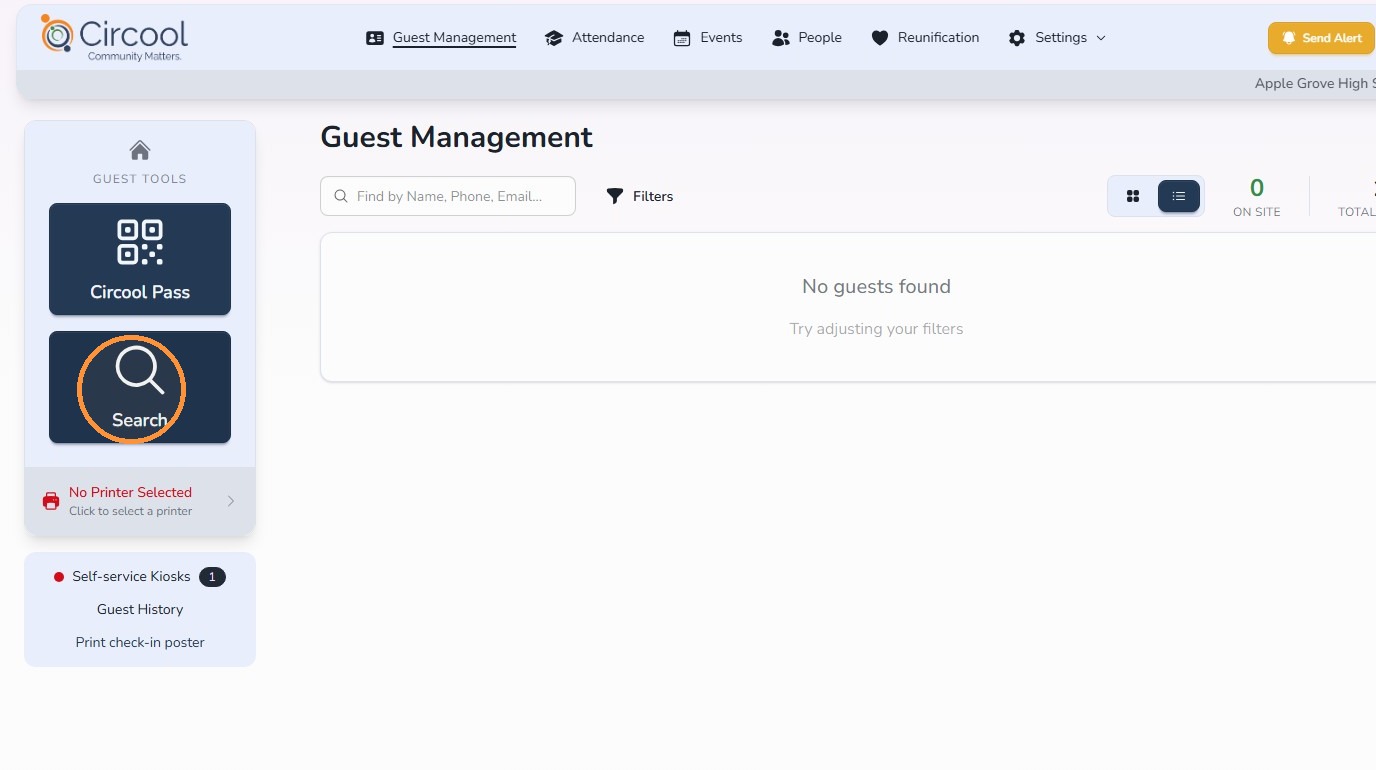
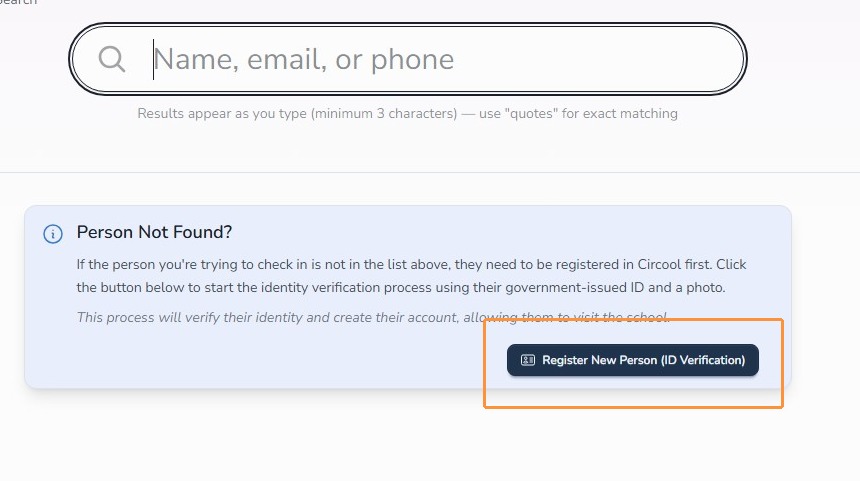
Step 2: Register a new person
- Click Register New Person (ID Verification).
Step 3: Capture the guest’s ID
Circool will ask you to capture a photo of the guest’s ID document.
- Ask the guest to hold their government-issued ID, such as a driver’s license or passport, near the webcam.
- Make sure the ID is close enough for the webcam to read clearly.
- Click the camera icon in the bottom-right corner.
- Click Confirm & Continue.
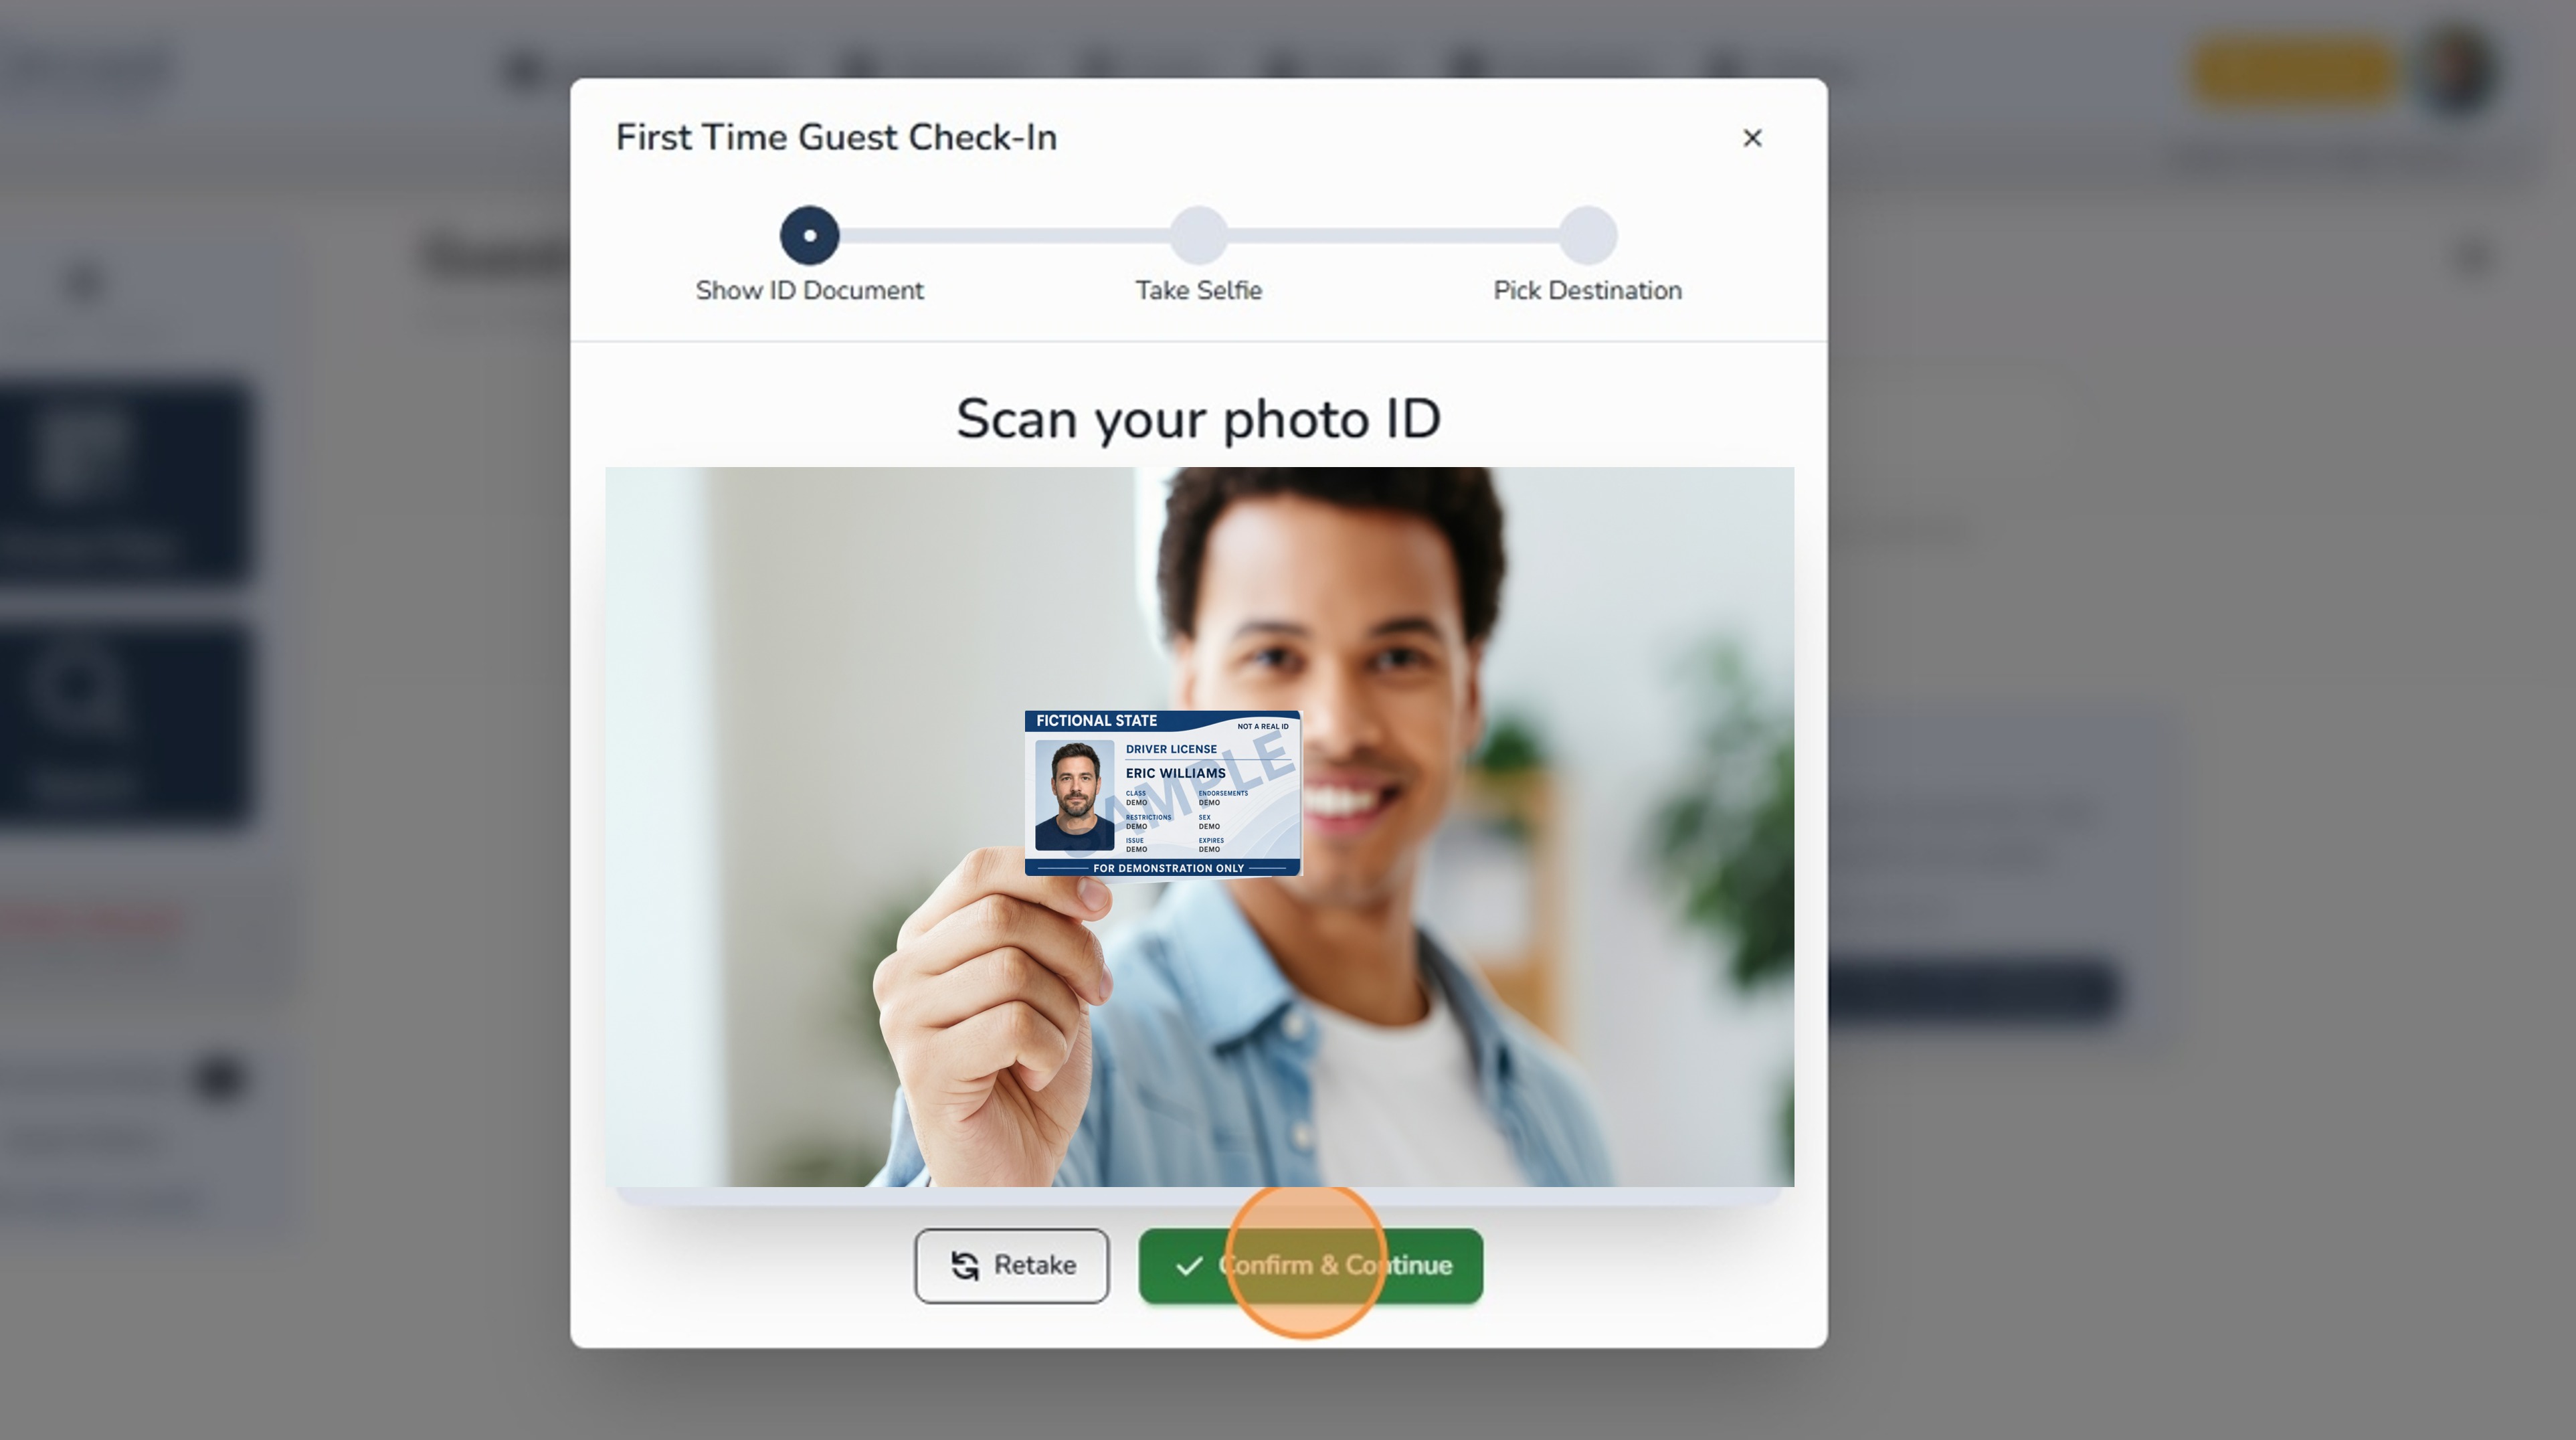
Tip: If the ID image is blurry, move the ID closer to the webcam and try again.
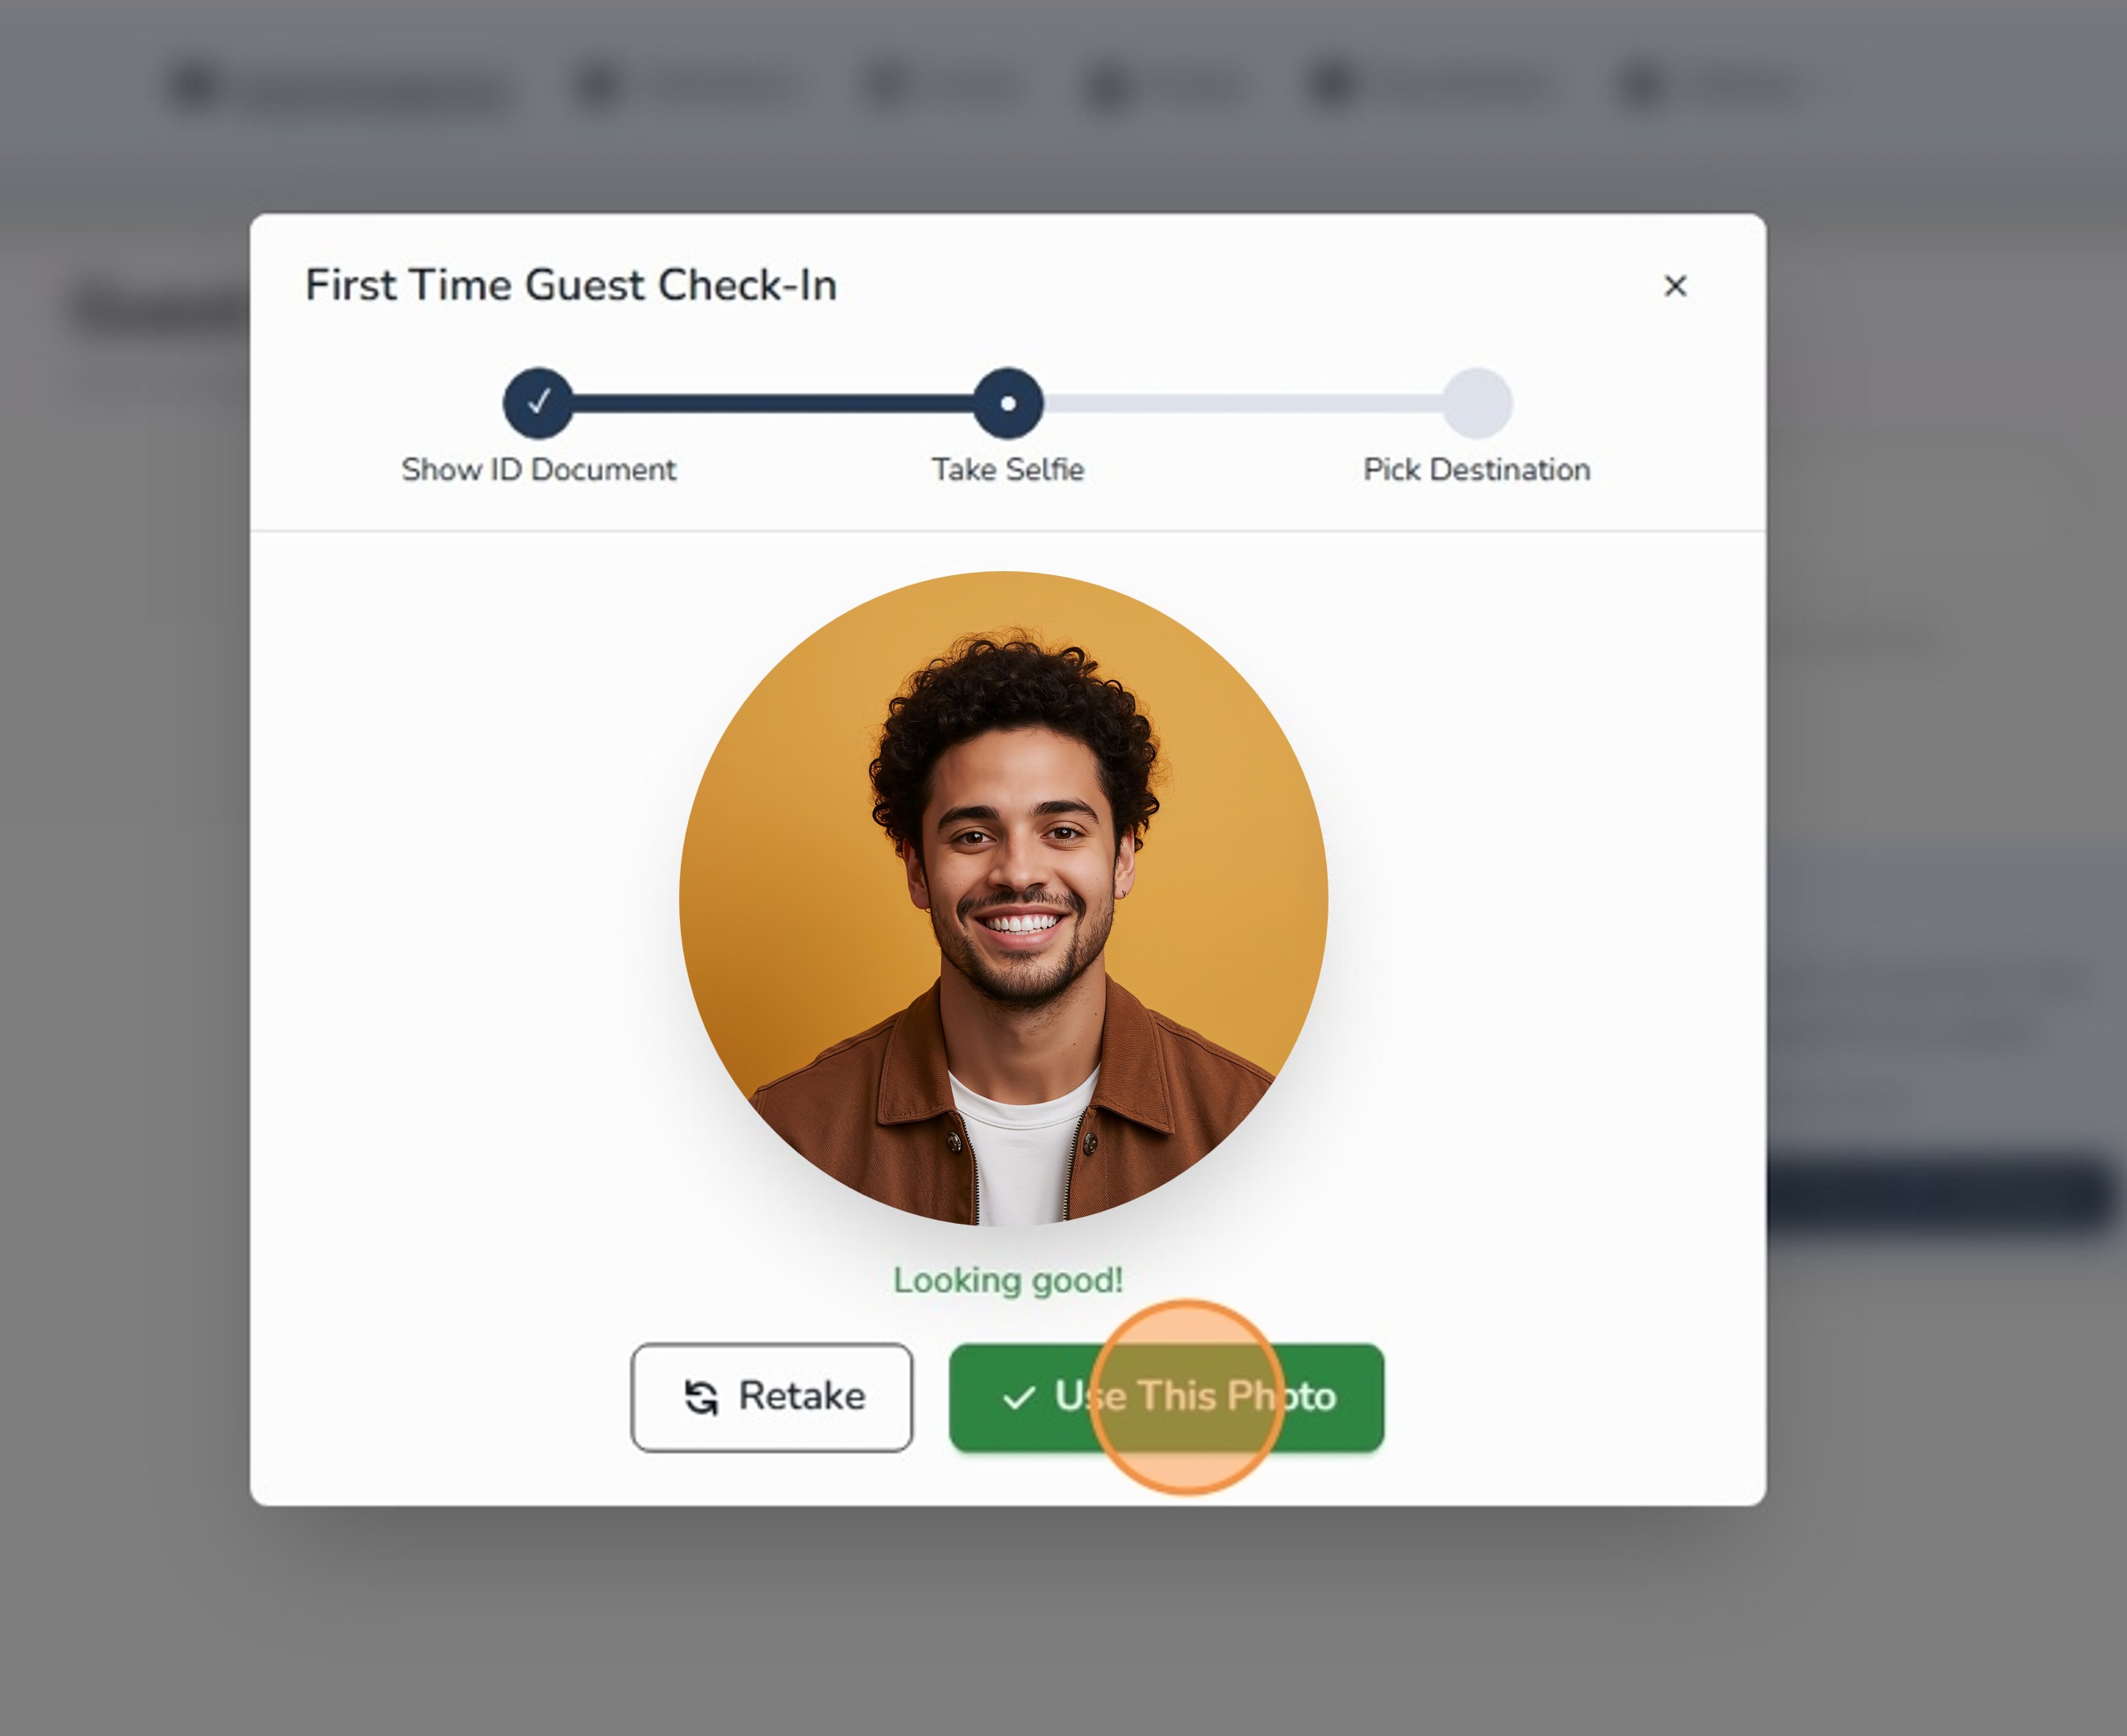
Step 4: Take the guest’s profile photo
Next, Circool will use the webcam to take the guest’s profile photo.
- Ask the guest to face the webcam.
- The camera should automatically detect the person’s face.
- If the photo is not captured automatically, click the camera icon in the bottom-right corner.
- Once the photo looks correct, click Use This Photo.
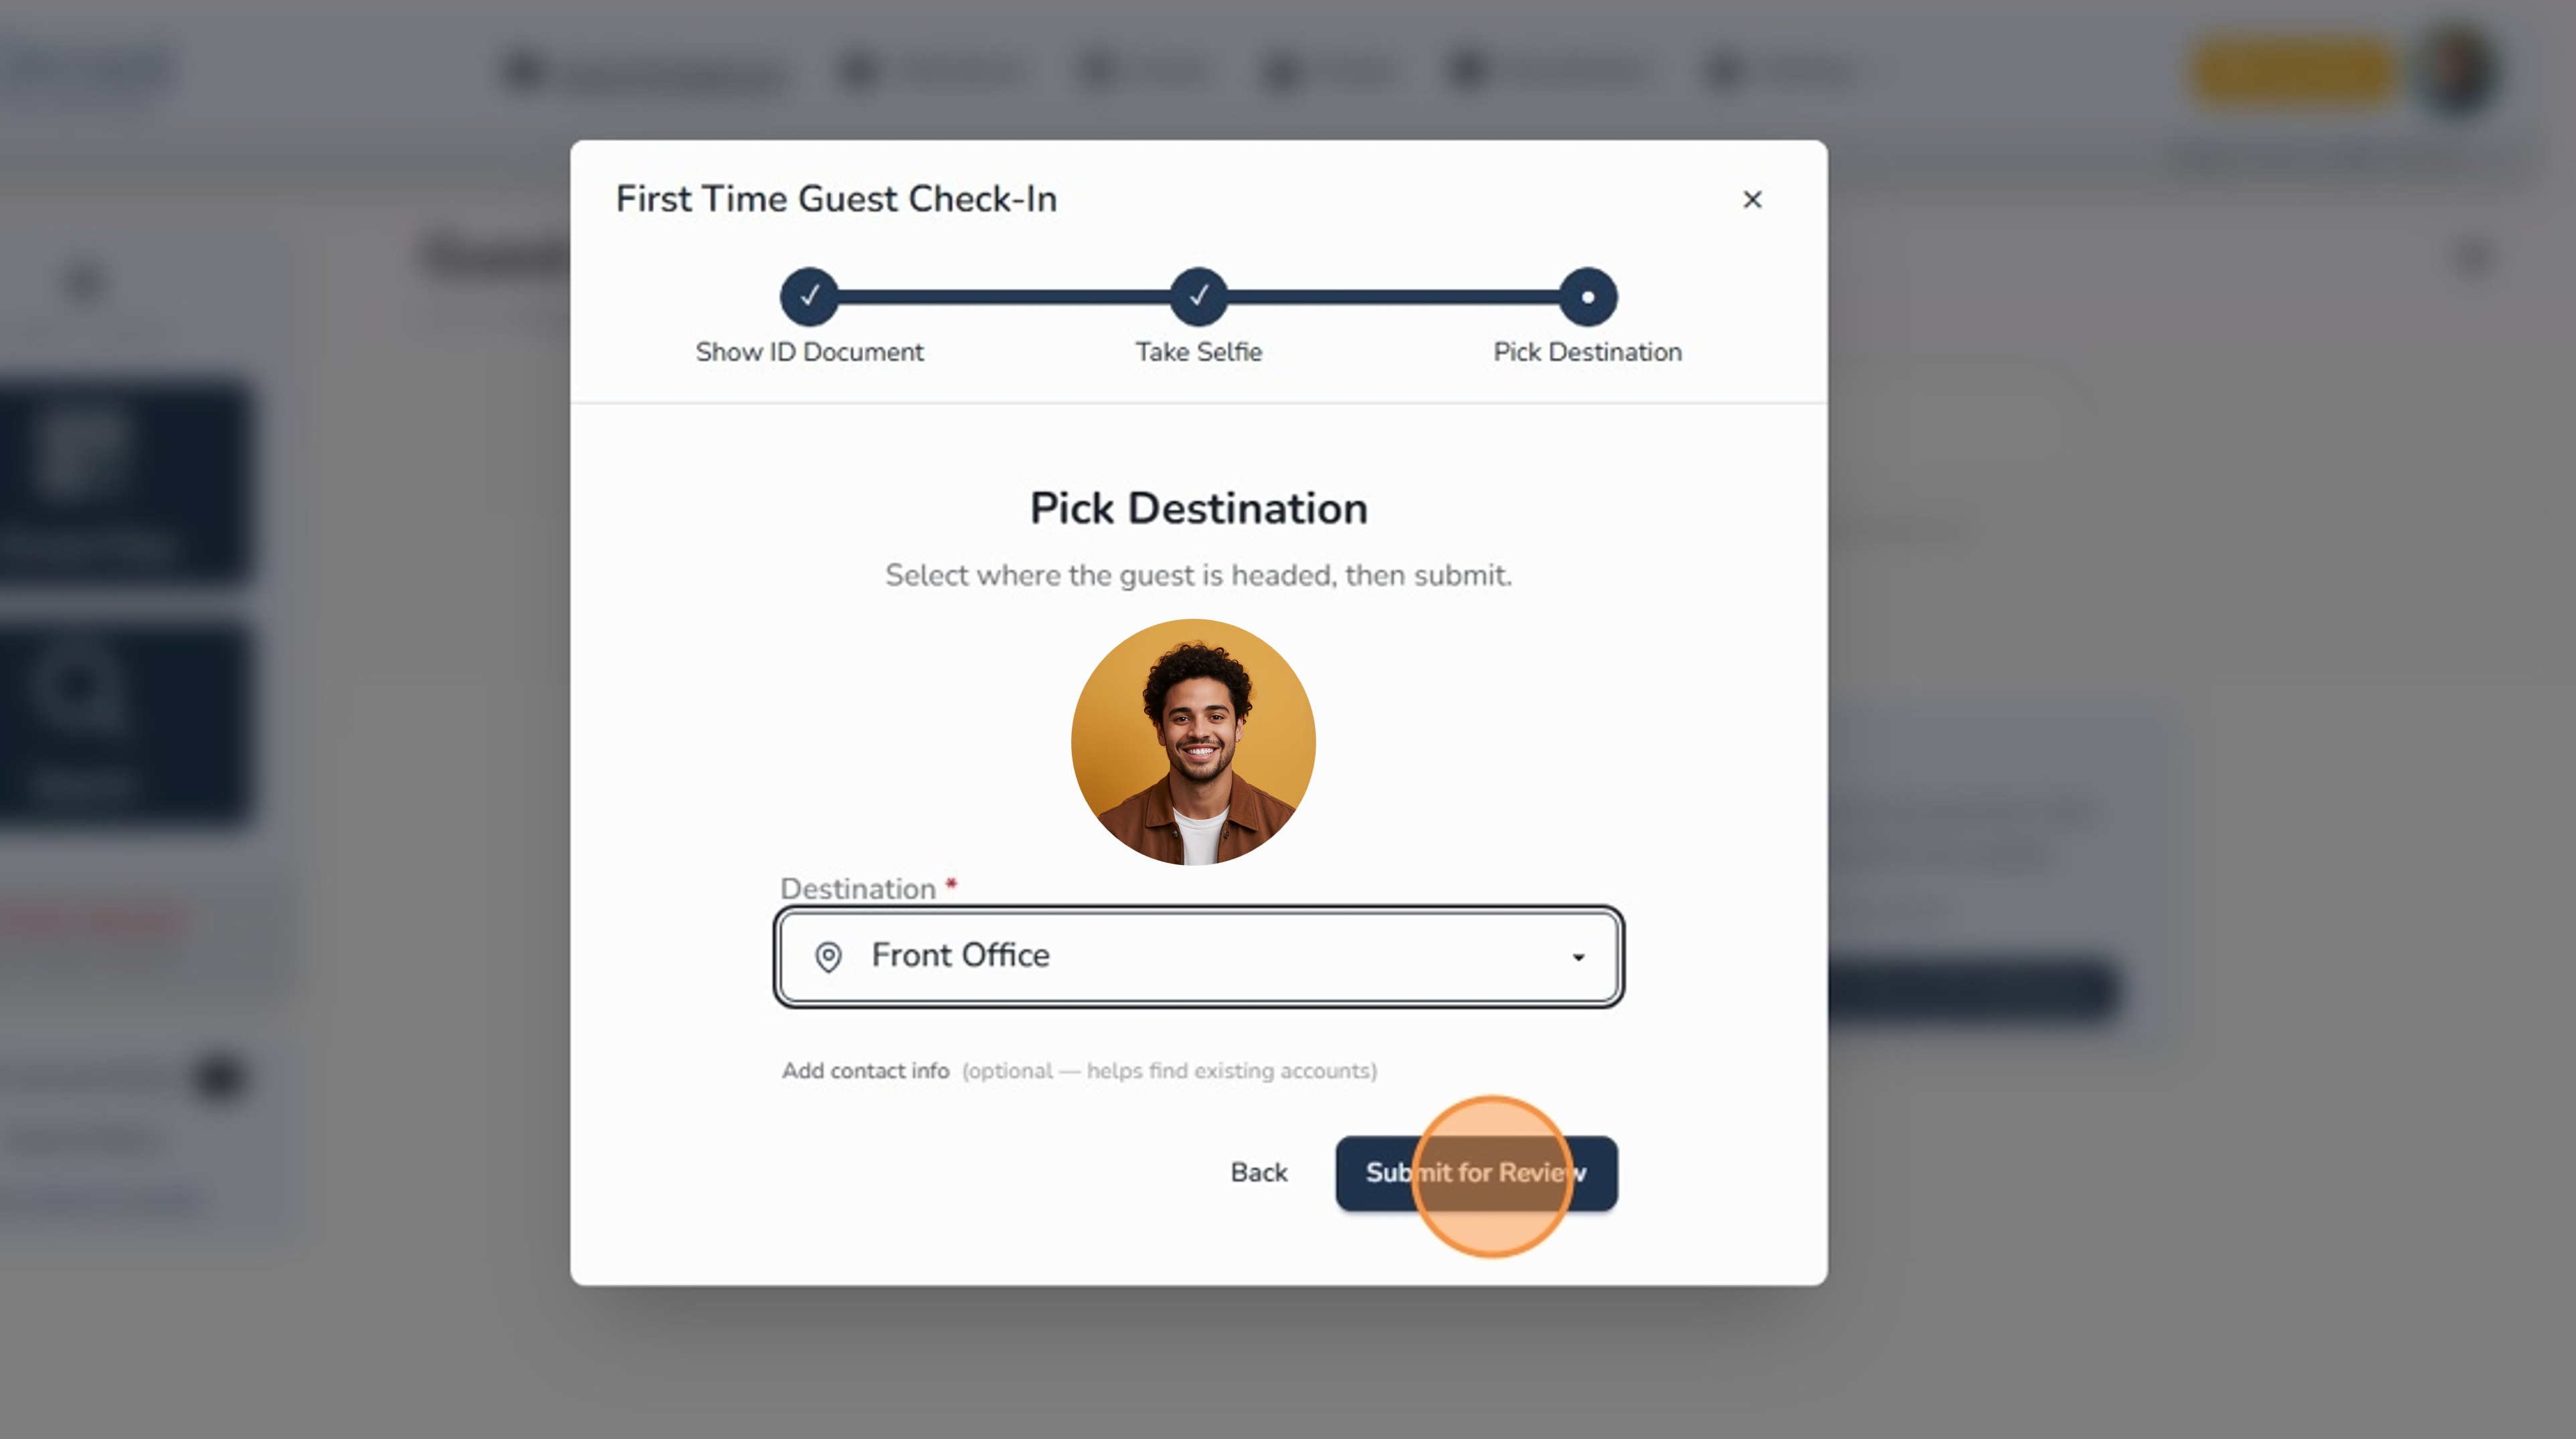
Step 5: Select a destination
- Select the guest’s Destination.
- Click Submit for Review.
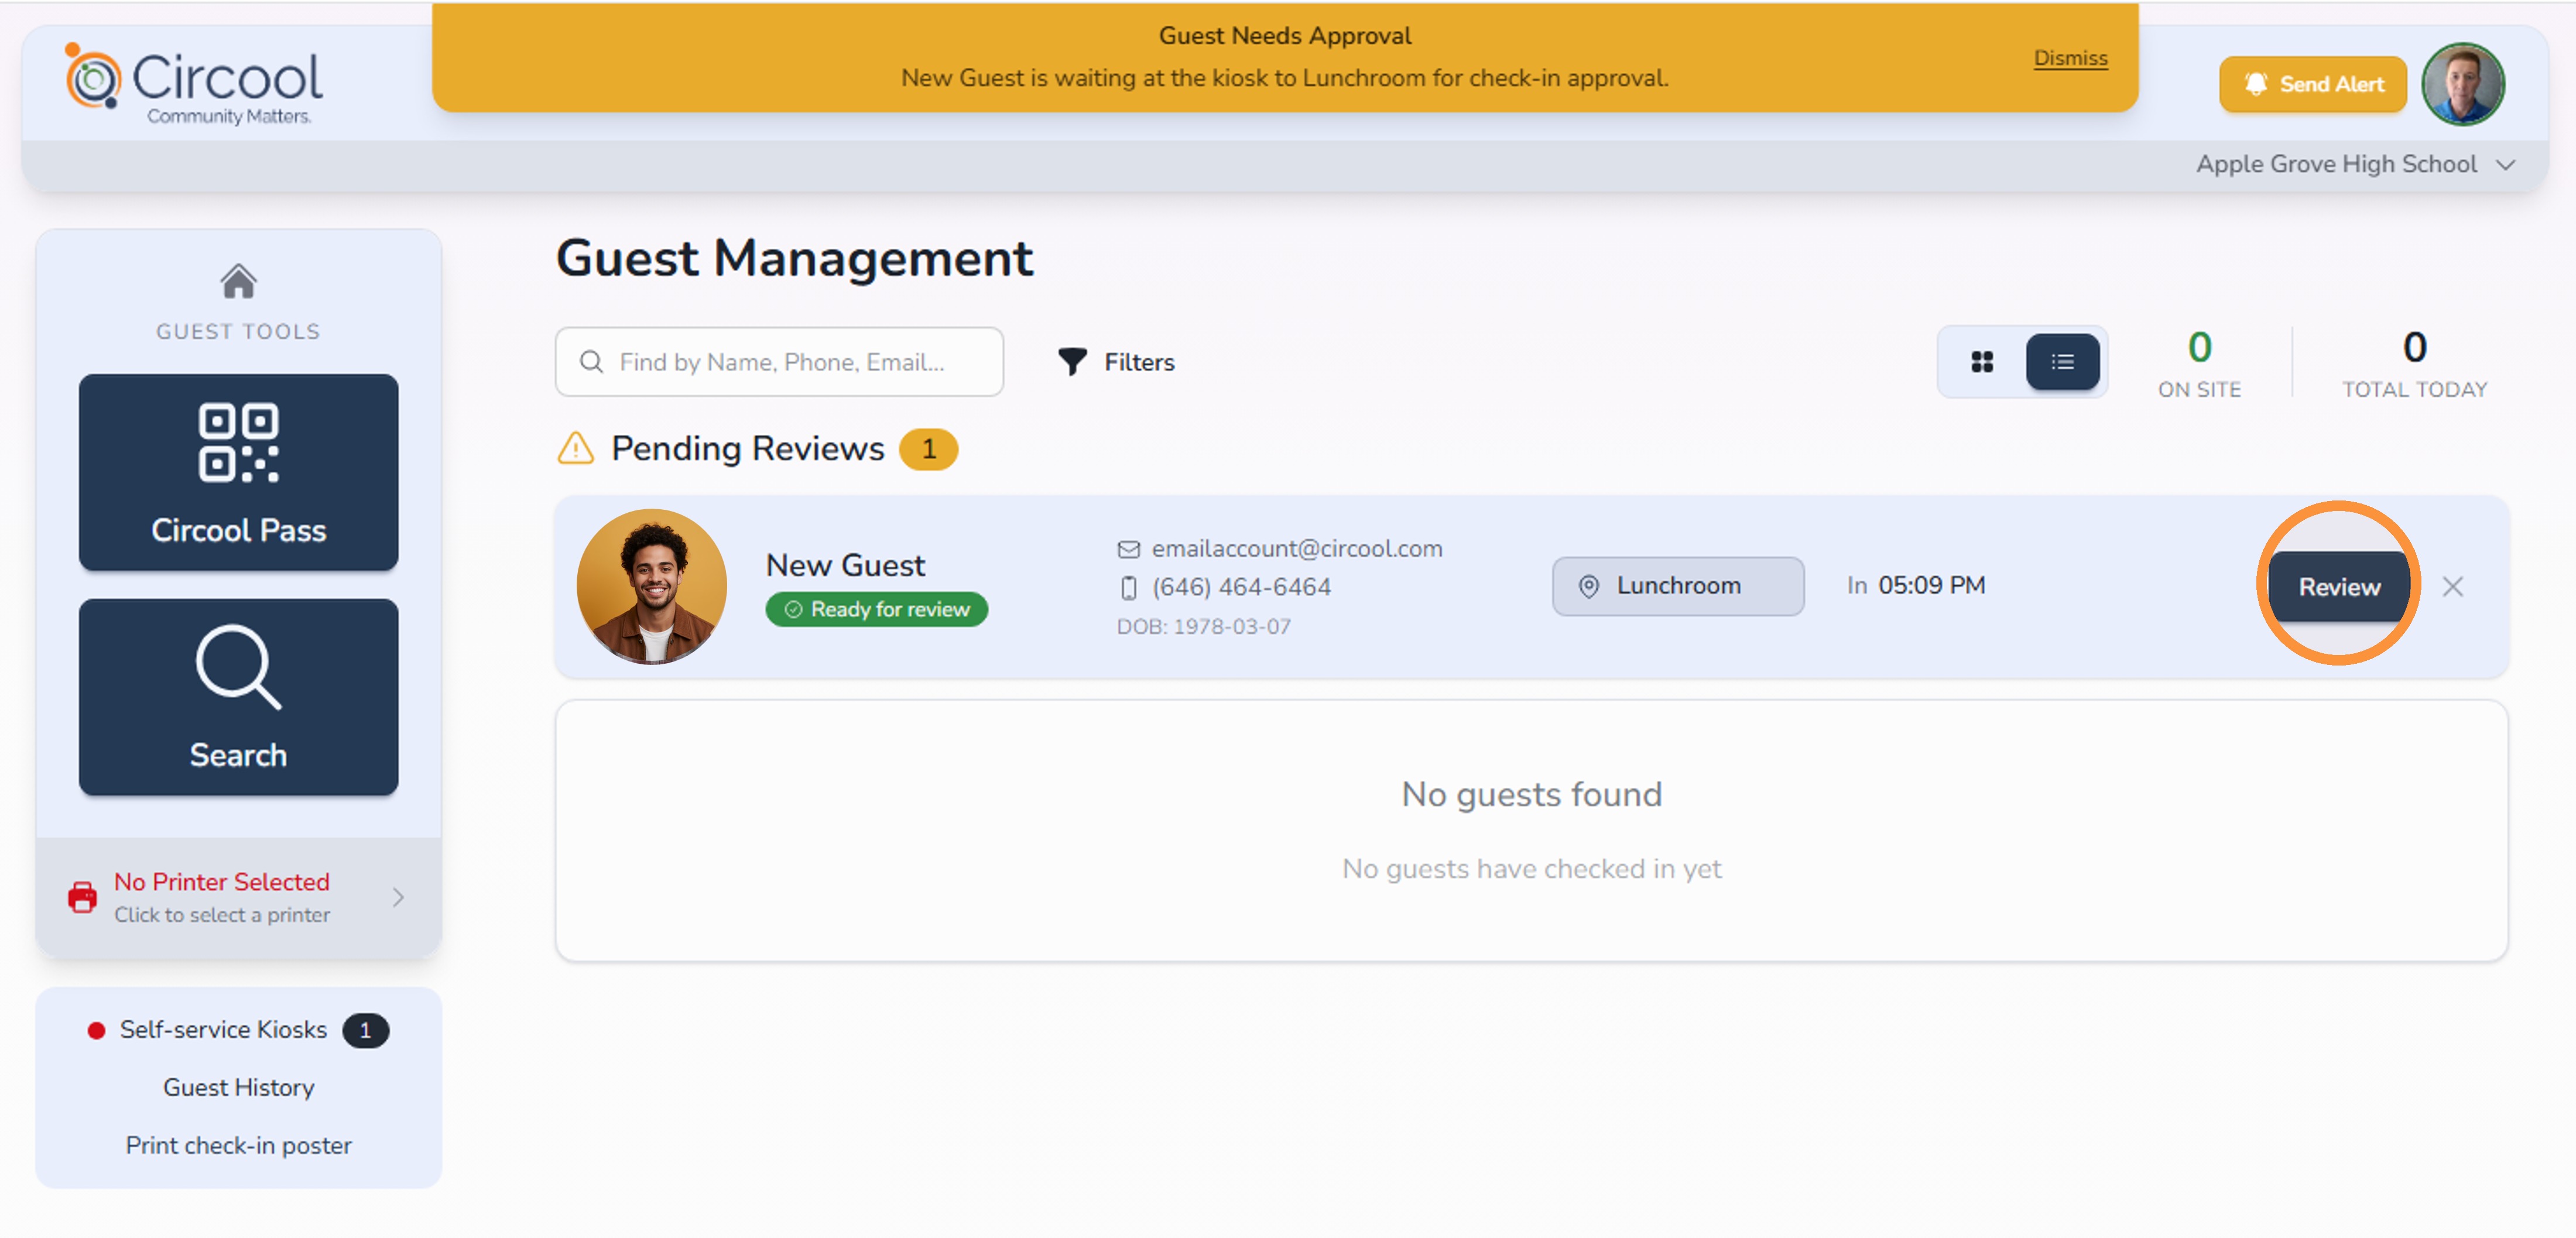
Step 6: Review the pending guest
After the guest is submitted, their information will appear under Pending Review.
- Click Review.
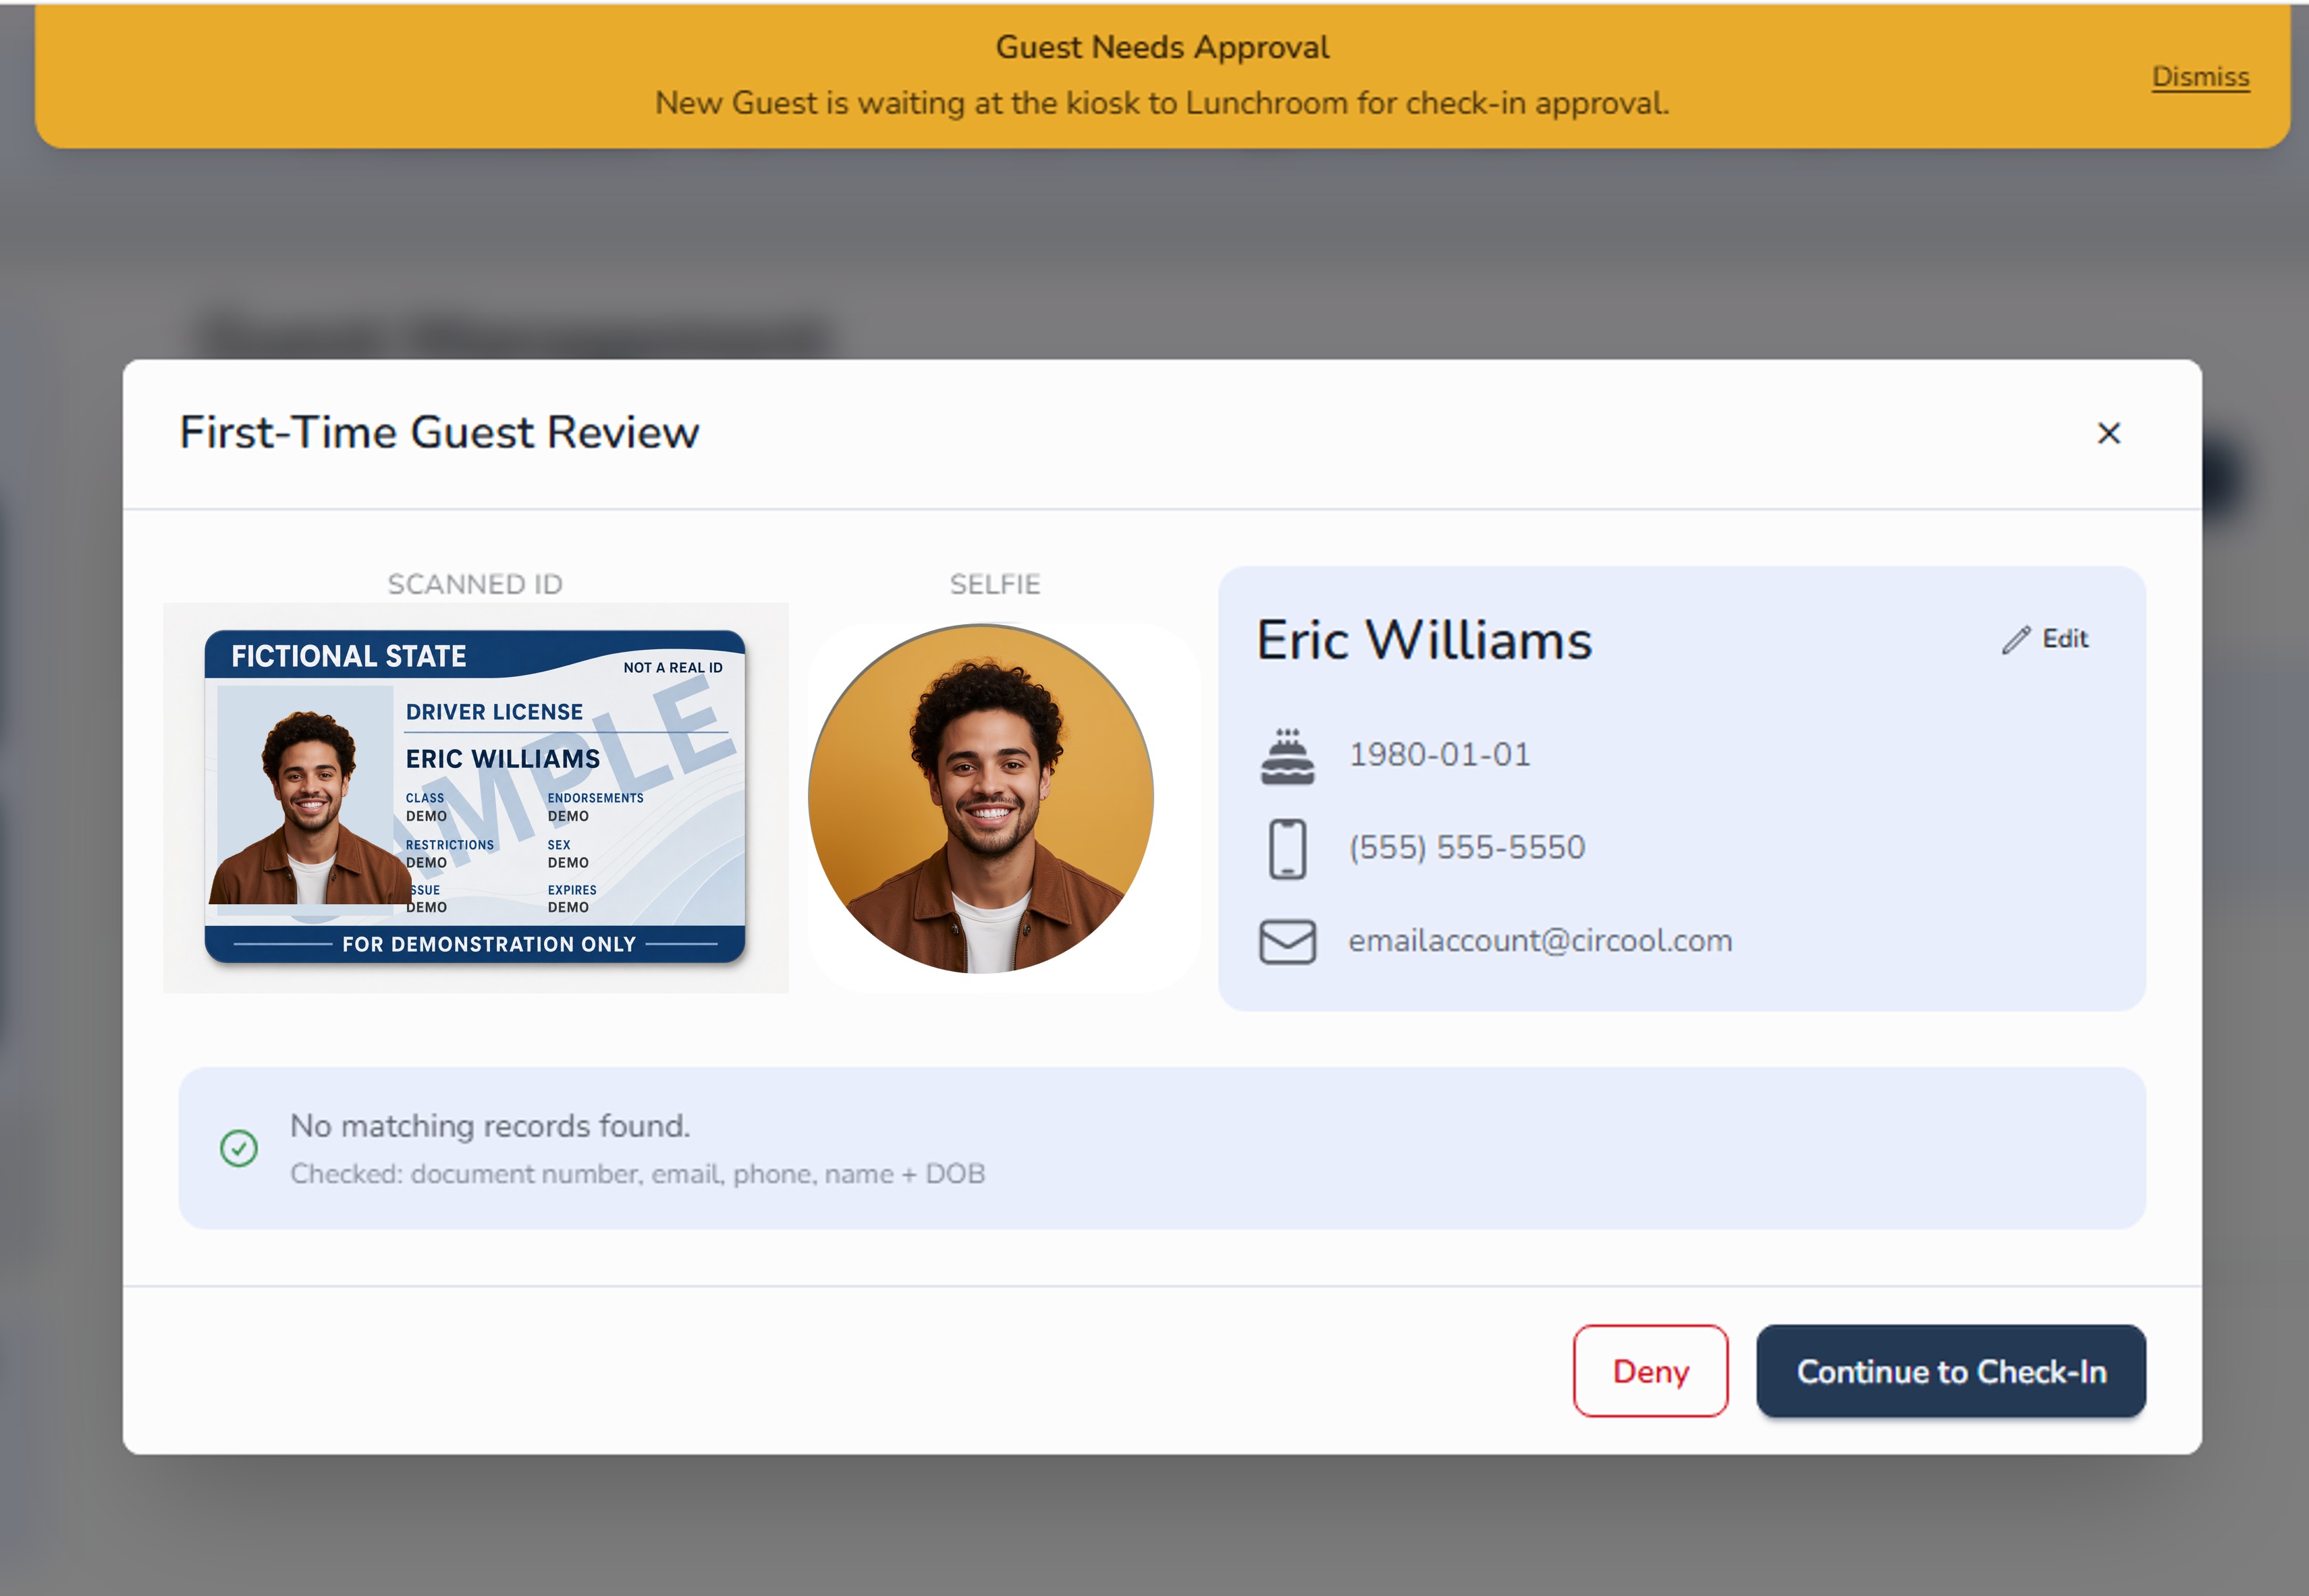
Step 7: Open the guest profile
Open the guest profile to review the details before completing check-in.
Step 8: Add contact information, if needed
If you want to add the guest’s phone number or email for future check-ins, you can edit their profile before continuing.
- Click Edit.
- Add the guest’s phone number or email address.
- Click Done.
- Click Continue to Check-In.
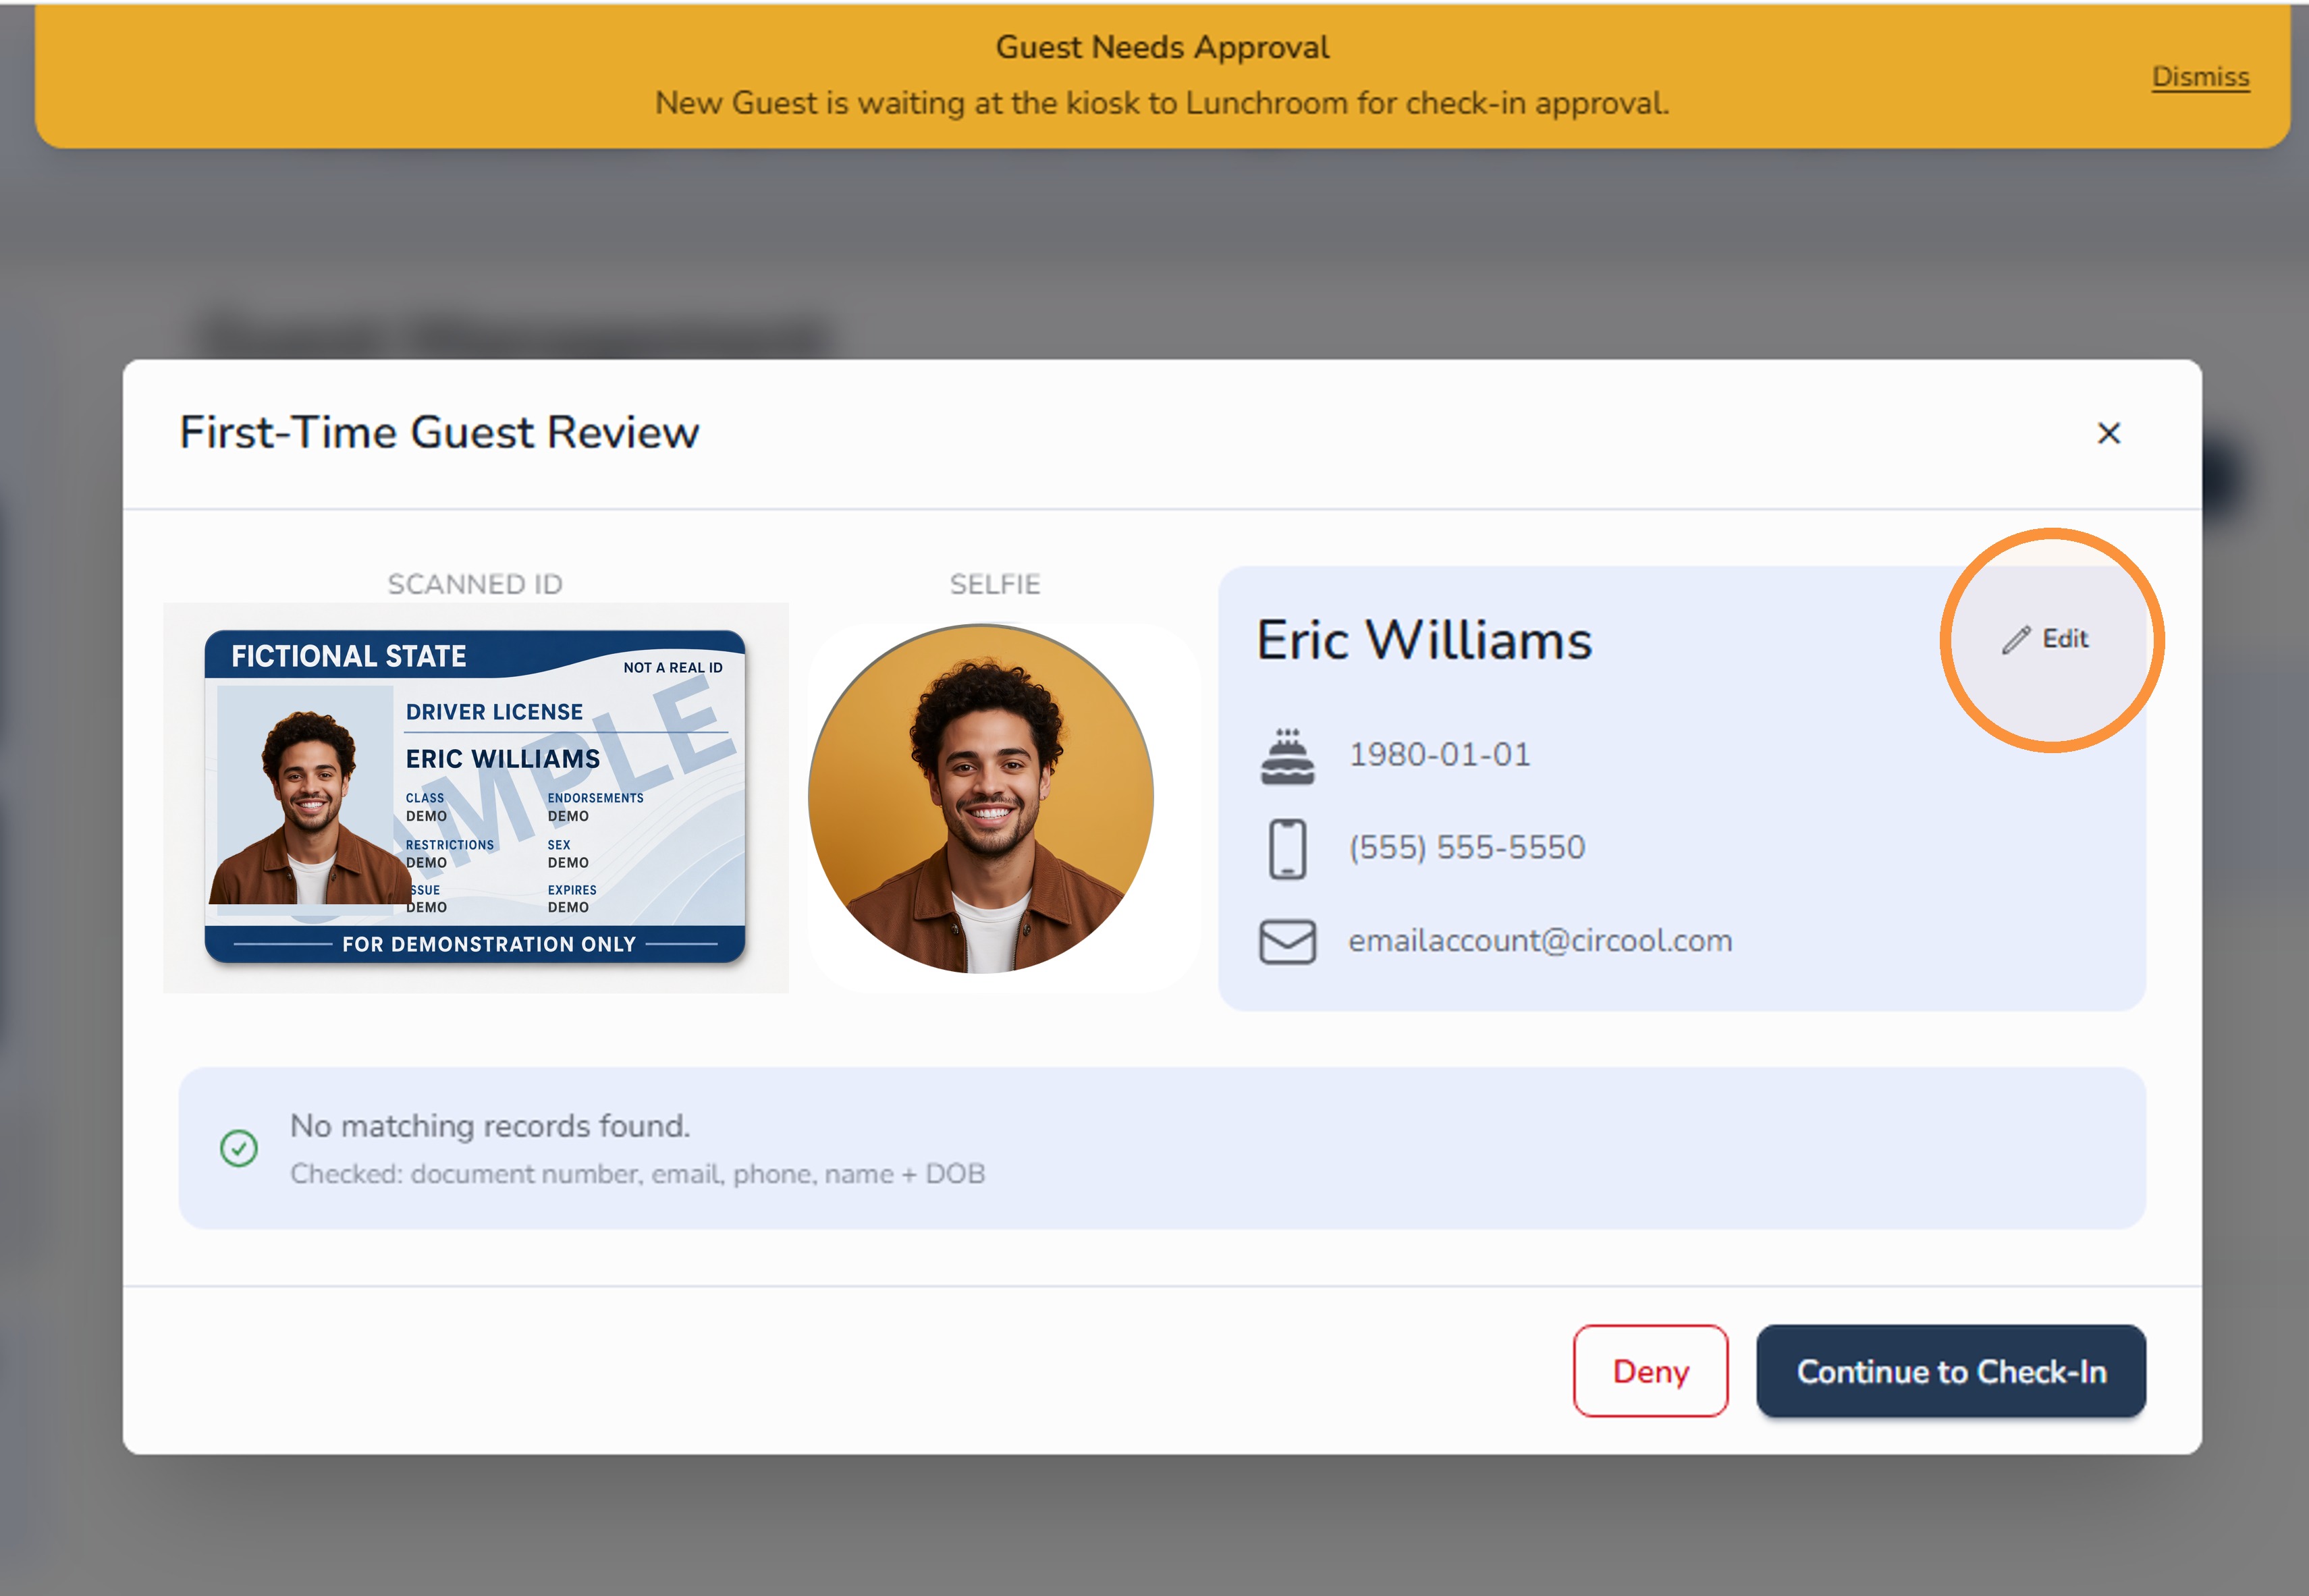
Good to know: Adding contact information can make future visits faster for returning guests.
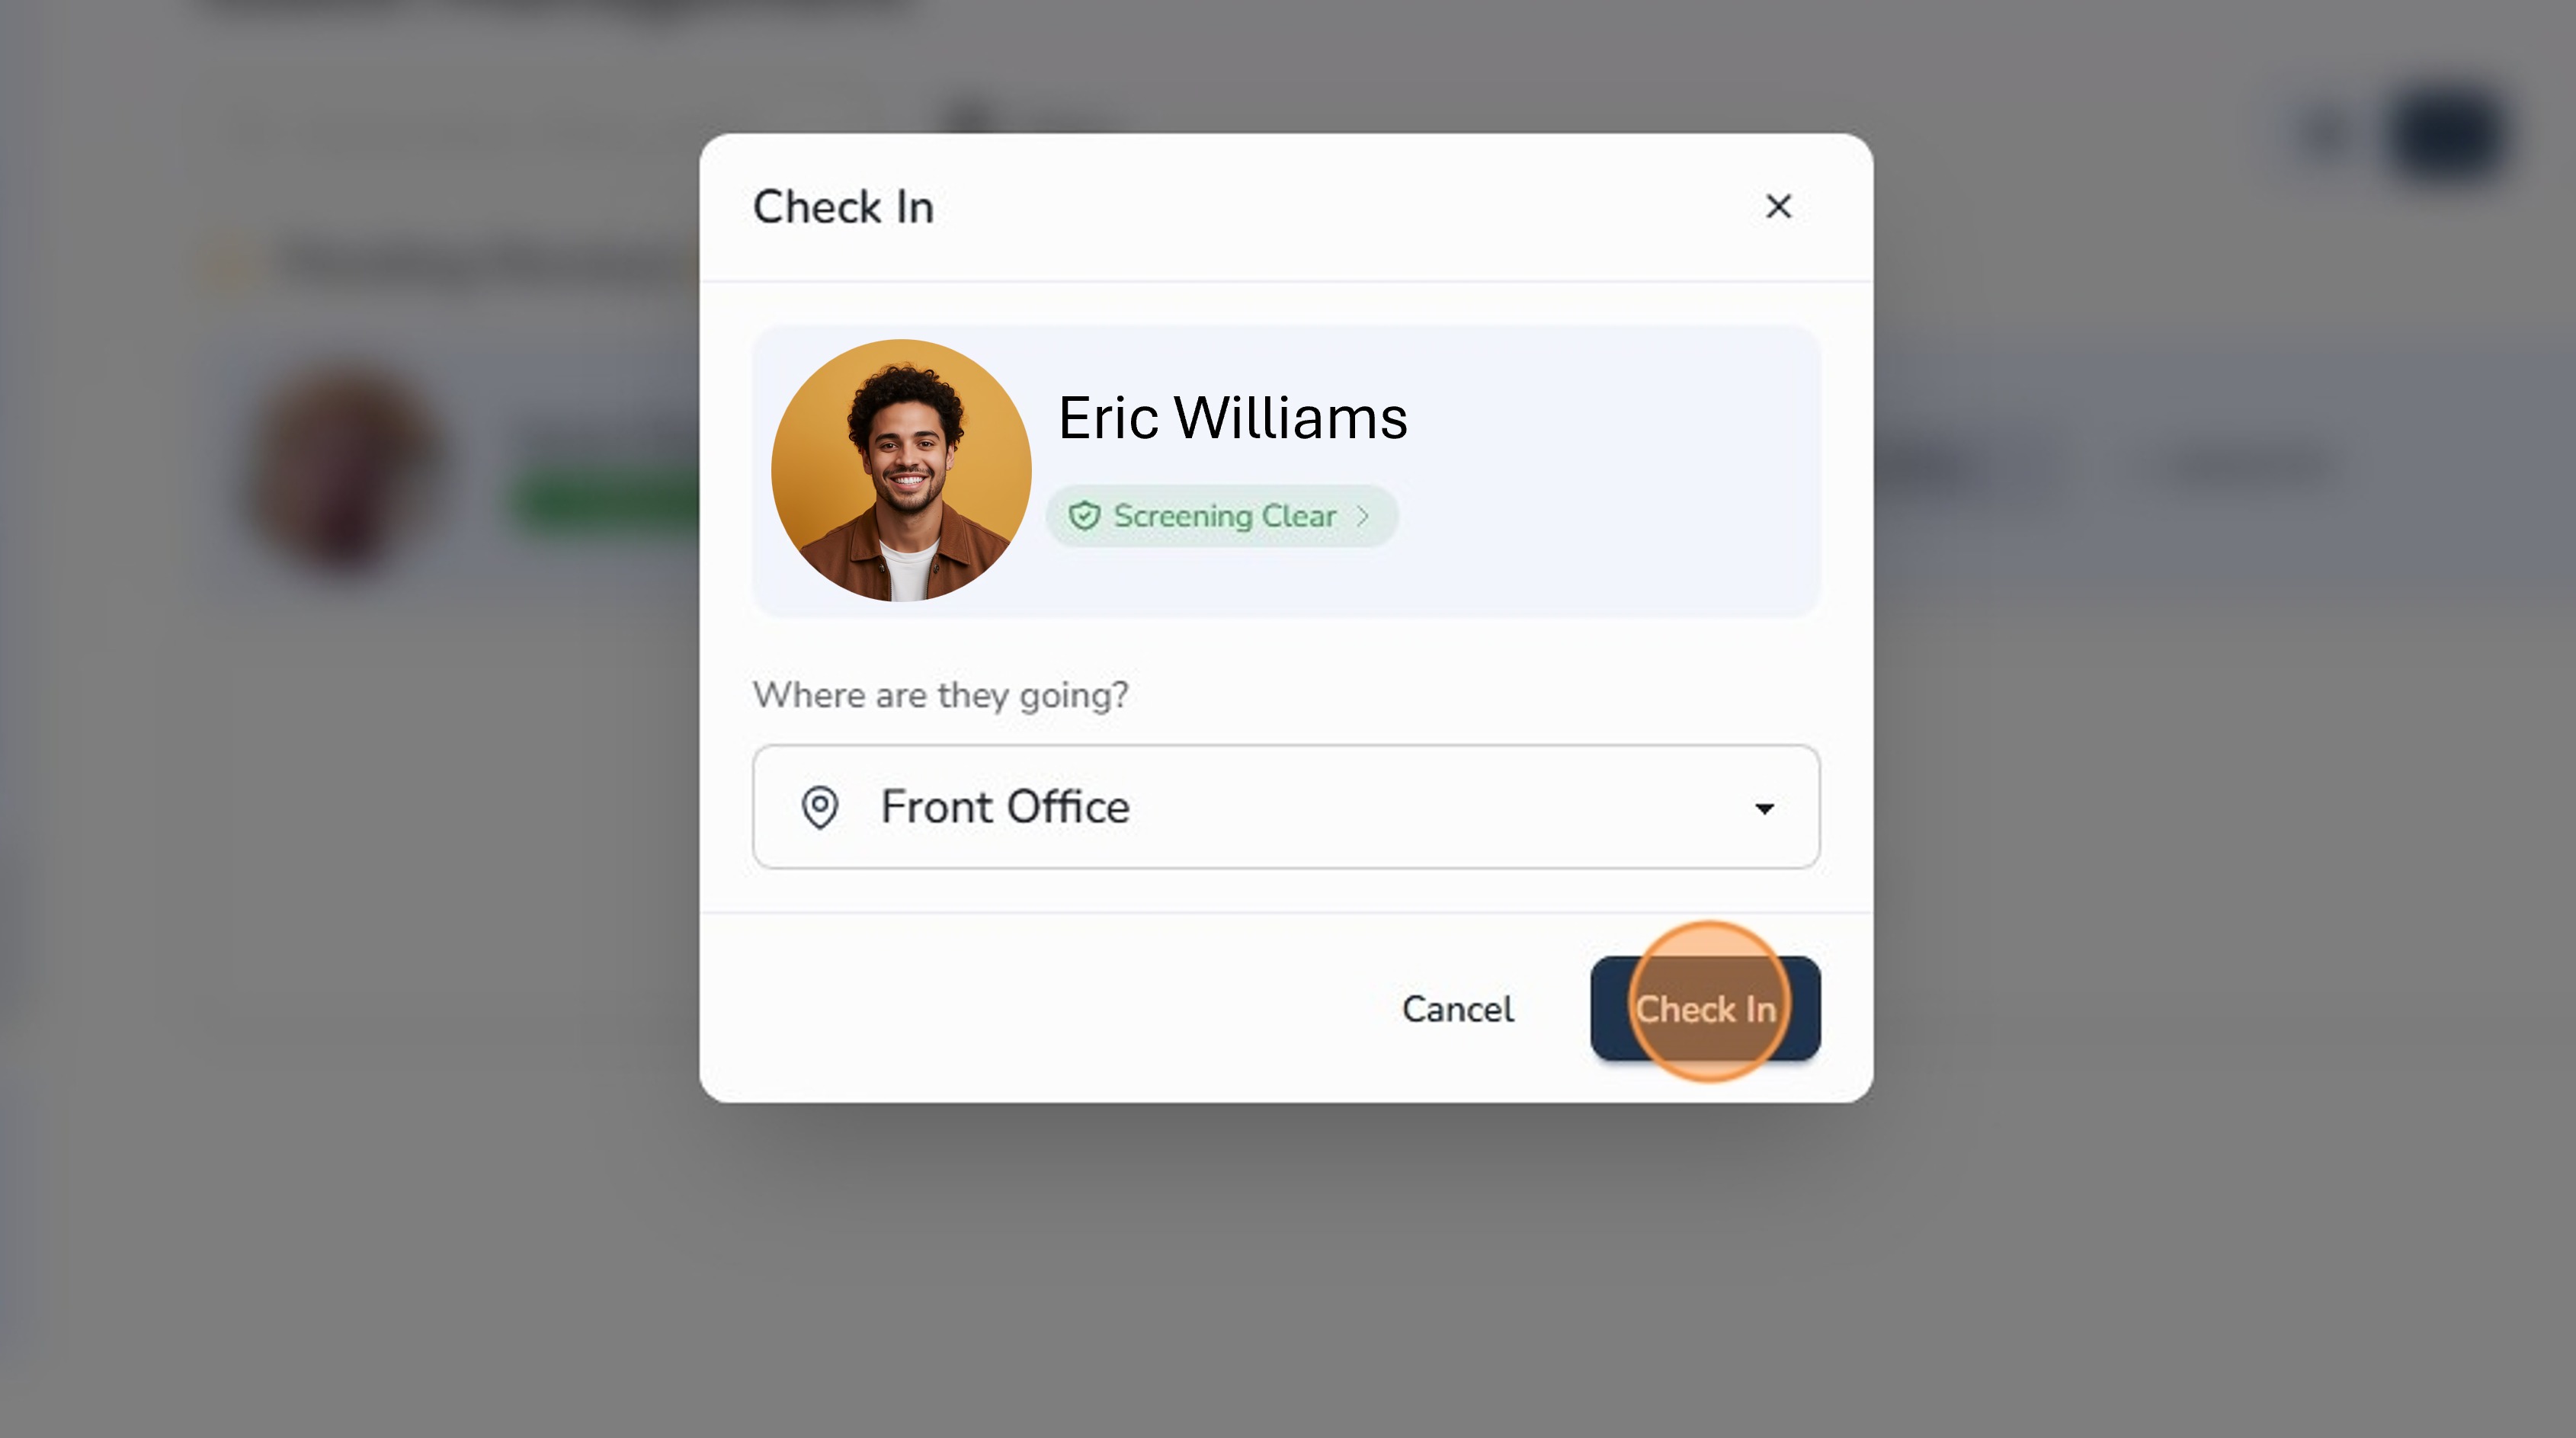
Step 9: Approve the destination and check in the guest
- Approve or select the guest’s Destination.
- Click Check In.
Step 10: View who has checked in today
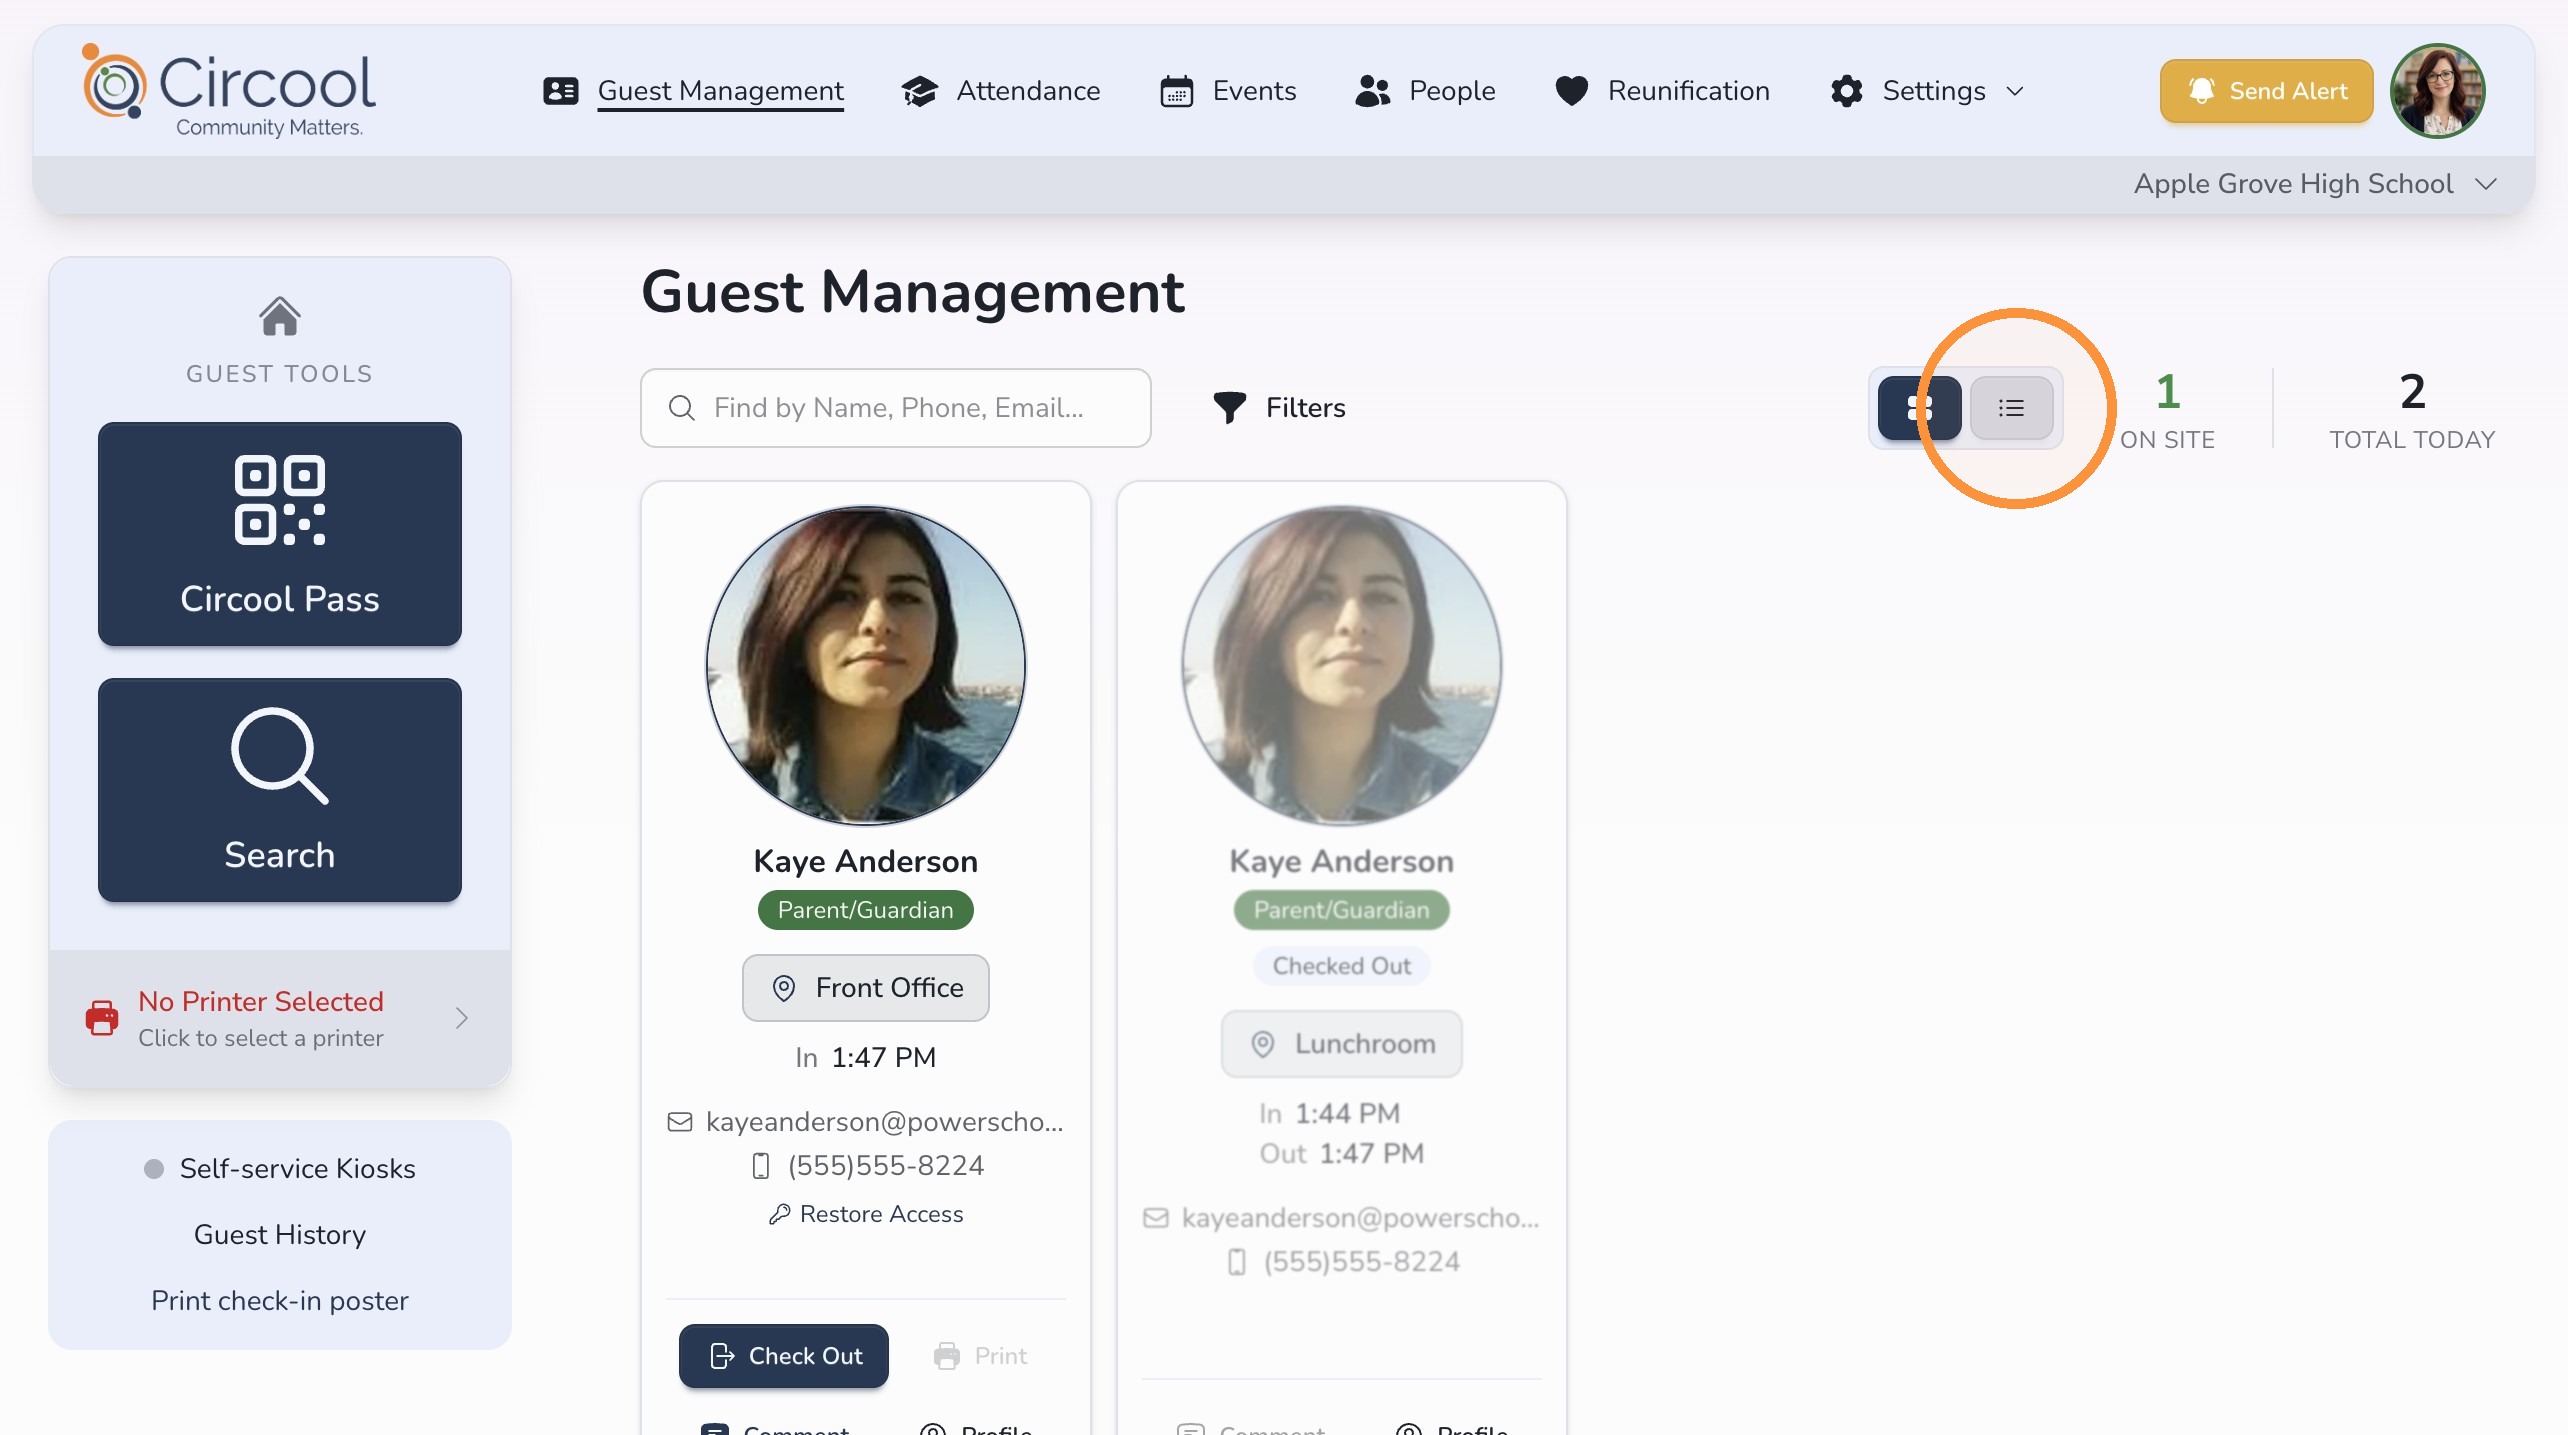
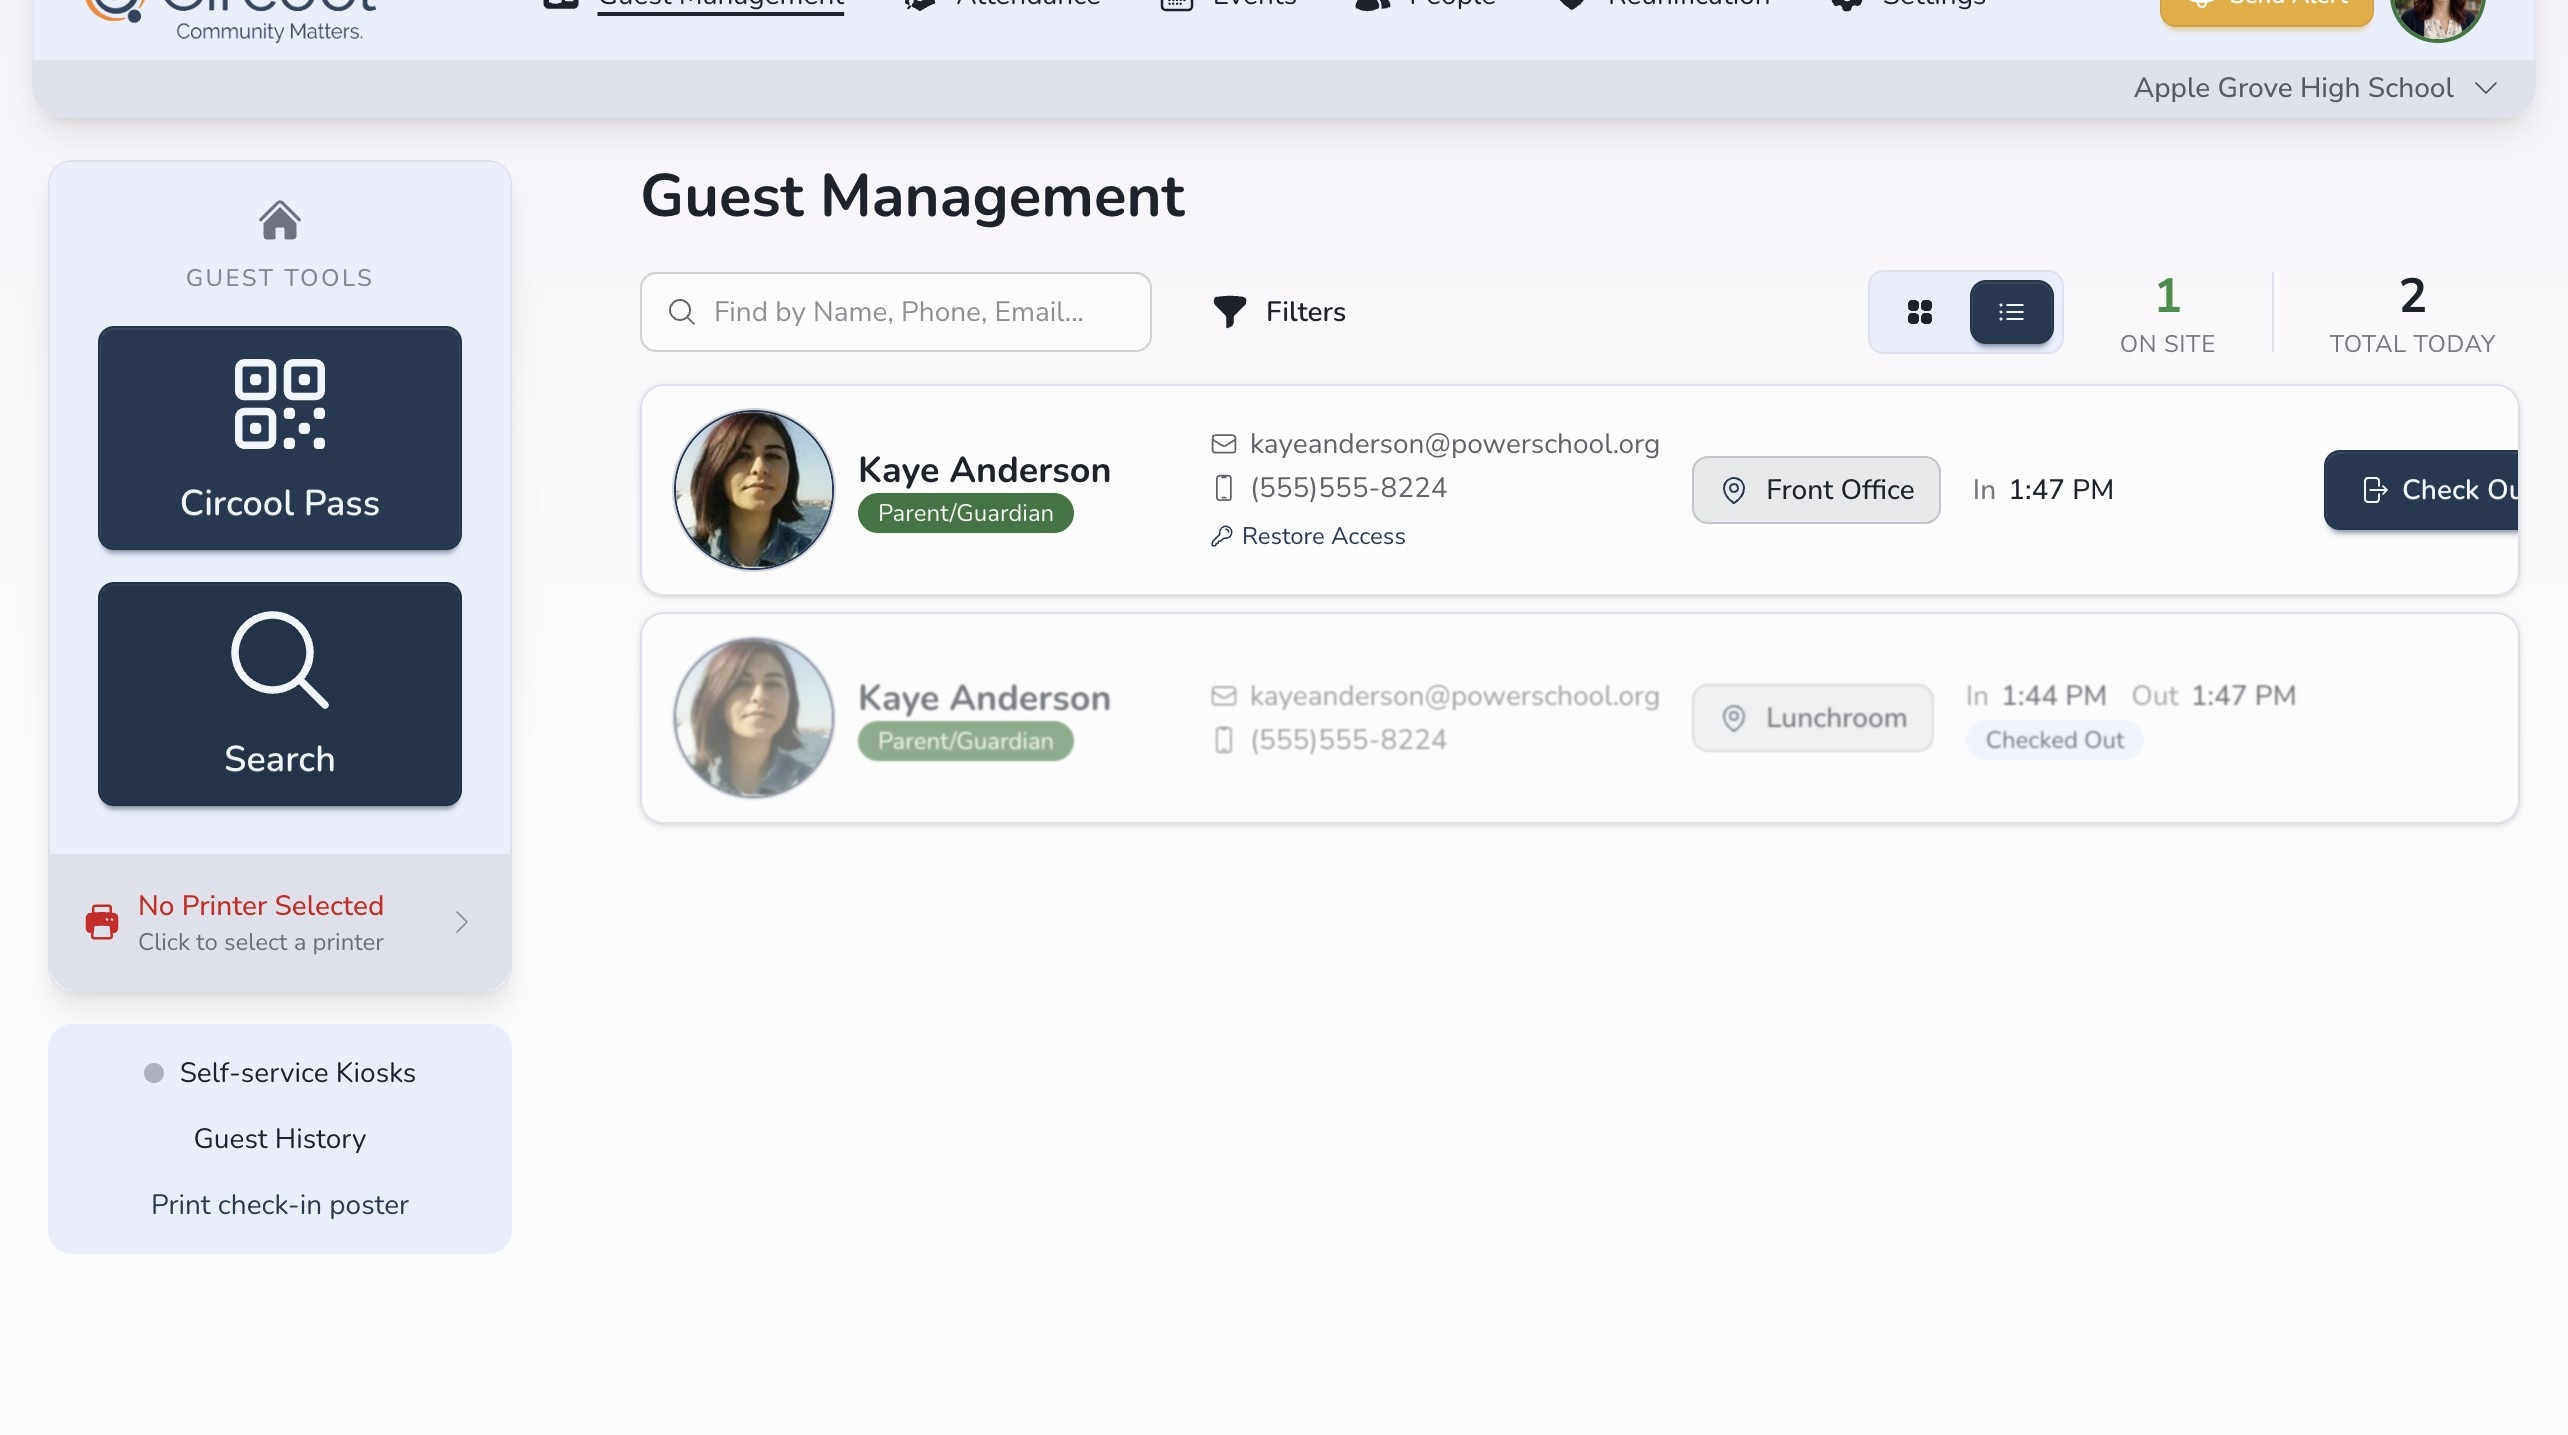
Your Dashboard shows who has checked in today.
- View guests in Card View or List View.
- Use Filters to quickly see guests who are still on site.
- To check someone out, click Check Out on their record.
- Circool saves the guest’s arrival and departure times so your school has a clear visit history.
Good to know: Once the Check Out button is no longer visible and the guest’s record appears faded, the guest has been successfully checked out.
Tip: Guests are automatically checked out at the end of the day, so your dashboard starts fresh each morning.
What happens next
After the guest is checked in, they will appear on your Guest Management dashboard for the day.
If your school prints badges, a guest badge may print based on your school setup. When the guest leaves, check them out from the dashboard to keep your visit history accurate.
That’s it. Manual registration gives your front desk a reliable way to check in a guest who does not have a phone or Circool Pass available.
Need help?
Circool support is here to help.
If you need help manually registering a new guest, capturing an ID, using the webcam, or completing guest check-in, contact Circool support by phone at 205.202.1124 or email support@circool.com.
Was this article helpful?
That’s Great!
Thank you for your feedback
Sorry! We couldn't be helpful
Thank you for your feedback
Feedback sent
We appreciate your effort and will try to fix the article