How to Enroll a New Self-Service Kiosk
If your school uses a self-service kiosk, such as an iPad or Chromebook, it will need to be enrolled before guests can use it.
This guide walks you through setting up a new kiosk and assigning it to the correct name badge printer.
Why use a self-service kiosk?
A self-service kiosk helps guests, parents, and guardians complete common check-in steps without the front desk having to handle every click.
With the kiosk, visitors can:
- Check in for a school visit
- Check out when they leave
- Activate or finish their Circool account
- Check a student in late
- Start a student check-out request
This helps keep the front office moving, especially during busy times like morning arrivals, lunch visits, events, and early check-outs.
The front desk still stays in control. Circool will route anything that needs staff review, approval, or extra attention back to the office before the process is completed.
Before you start
Any device with a front-facing camera and internet connection can be used as a self-service kiosk. Common options include:
- iPads
- Chromebooks
- Other touchscreen devices with a camera and internet access
Tip: For this setup, you will need the device you plan to use as the kiosk.
Step 1: Log in to Circool on your computer.
- Go to Guest Management.
- Click Self-Service Kiosks.
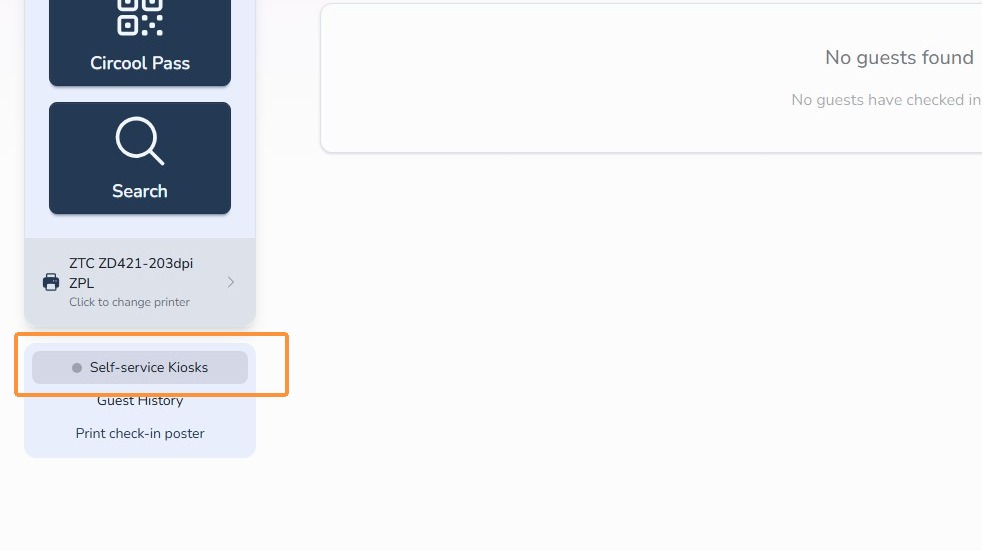
Step 2: Enroll a new kiosk
- Click Enroll New Kiosk.
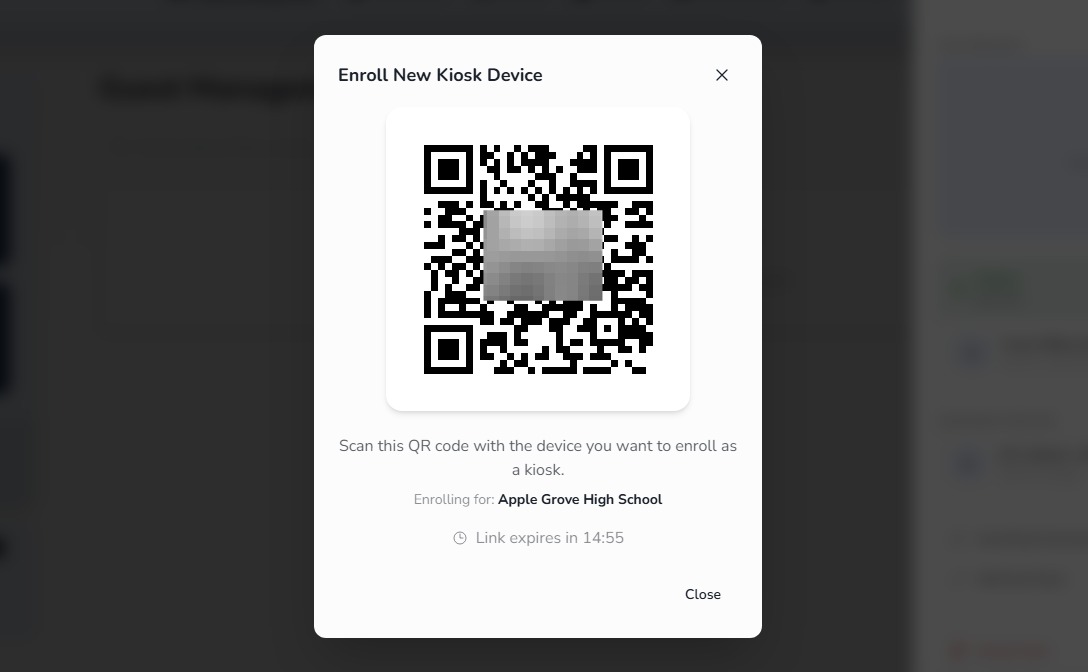
- A QR code will appear on your computer screen.
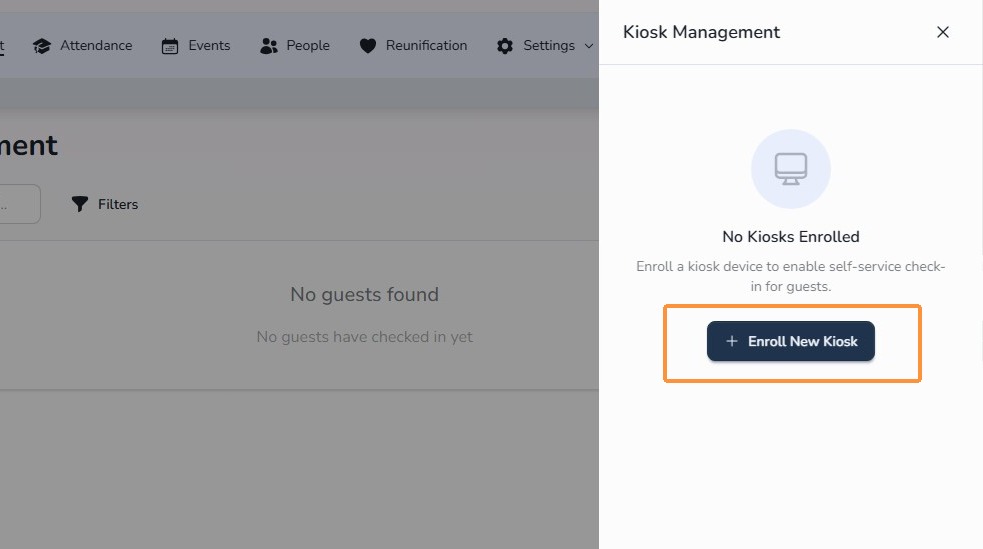
Step 3: Scan the kiosk enrollment QR code
On the iPad, Chromebook, or device you want to use as the kiosk:
- Open the Camera app.
- Point the camera at the QR code displayed on your computer screen.
- Tap the link that appears.
- The link should open in Safari or Chrome.
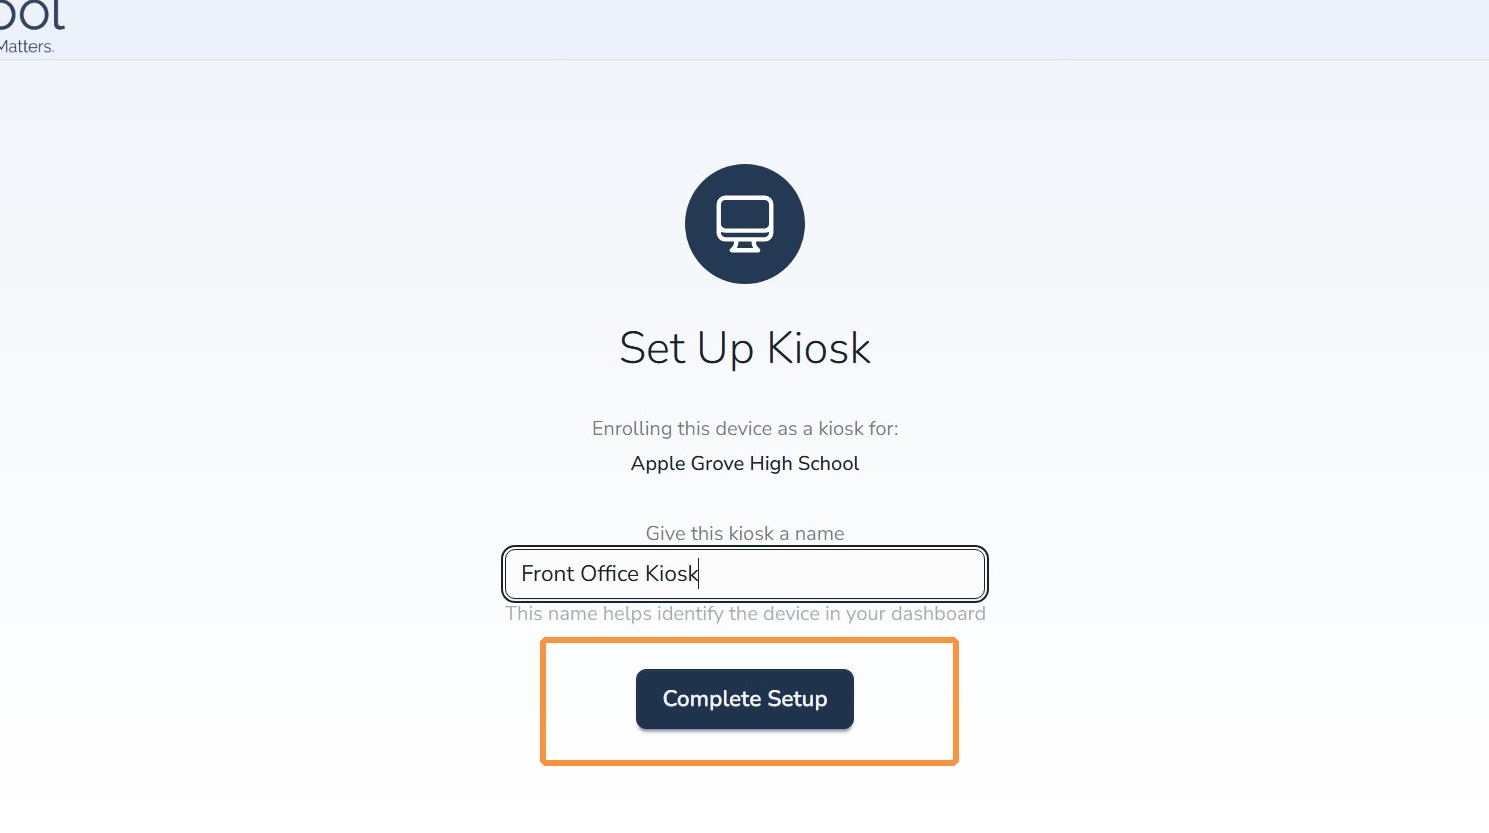
Step 4: Name the kiosk
The kiosk device should open a setup screen.
- Enter a clear name for the device.
- Use a name your team will recognize, such as Bayside Middle Circool Kiosk.
- Tap Complete Setup.
Step 5: Confirm the kiosk is on your school
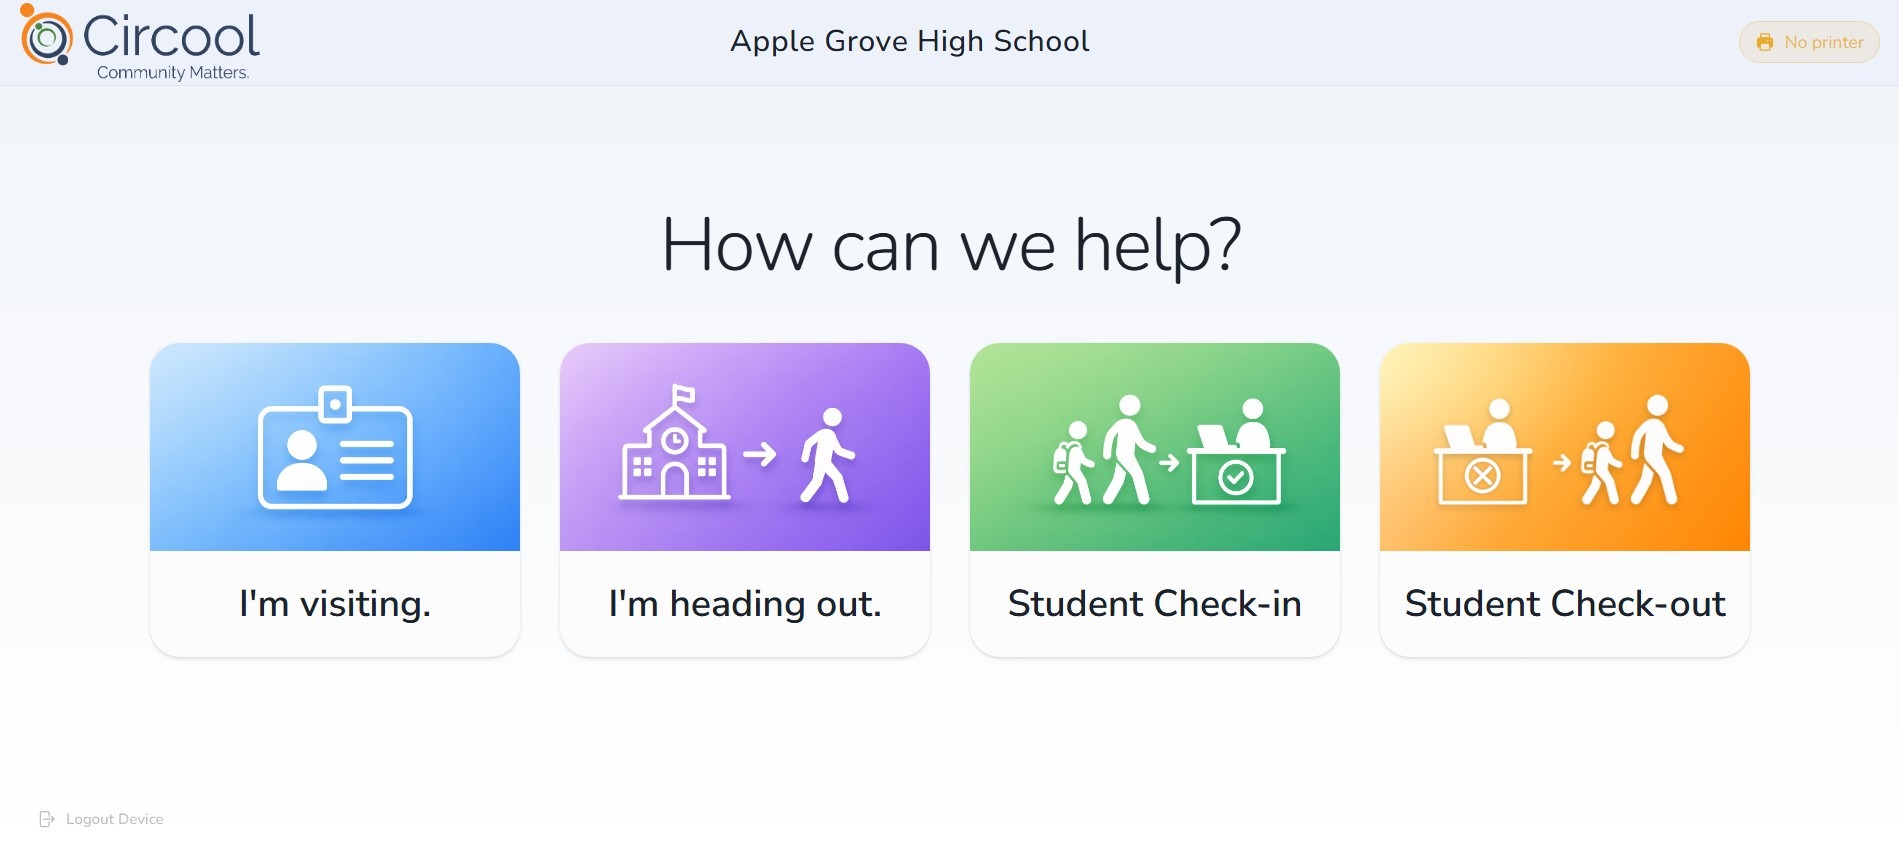
After setup is complete, the kiosk should show a Circool check-in screen.
Make sure your school name appears at the top of the kiosk screen.
Step 6: Assign the kiosk to a printer
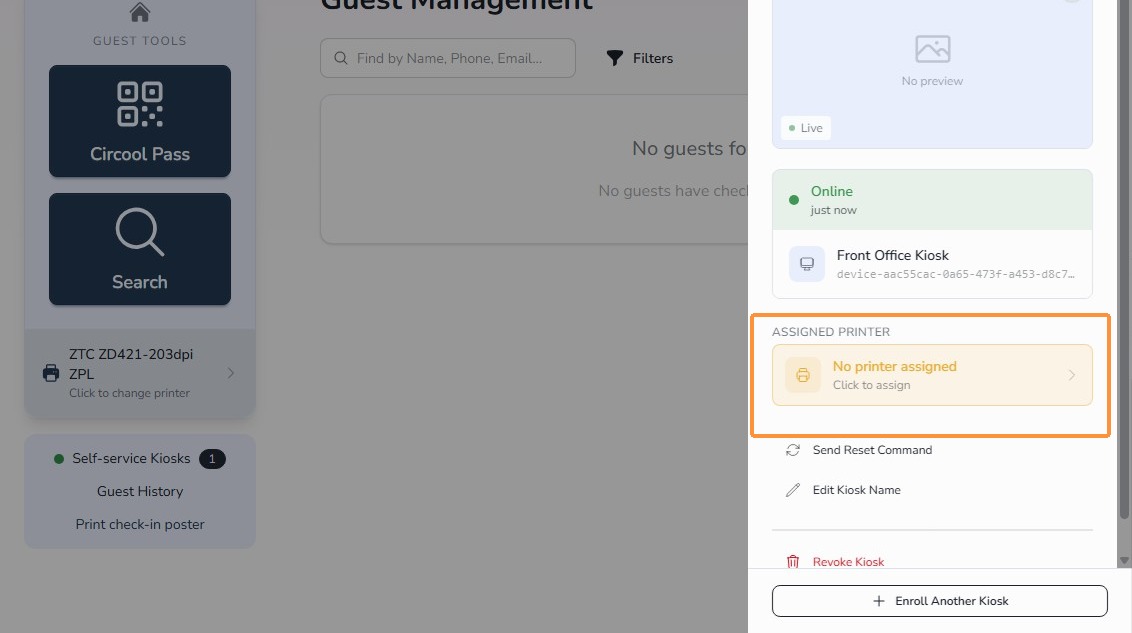
After the kiosk is enrolled, switch back to Circool on your computer.
- Select the newly enrolled kiosk.
- Click No Printer Assigned.
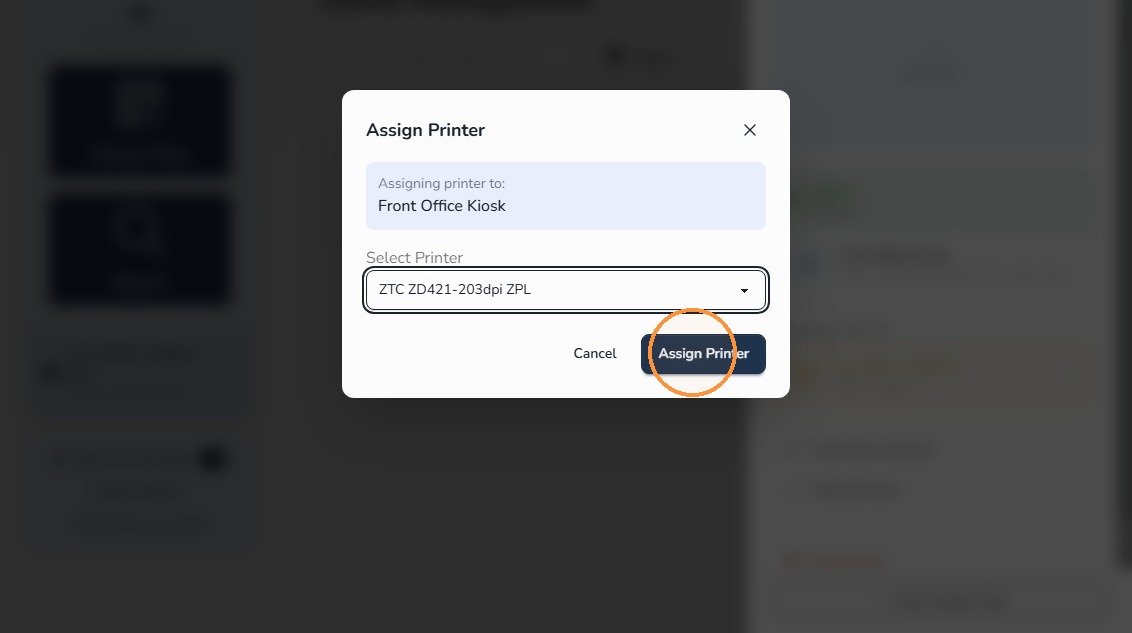
- Select the name badge printer this kiosk should use.
- Click Assign Printer.
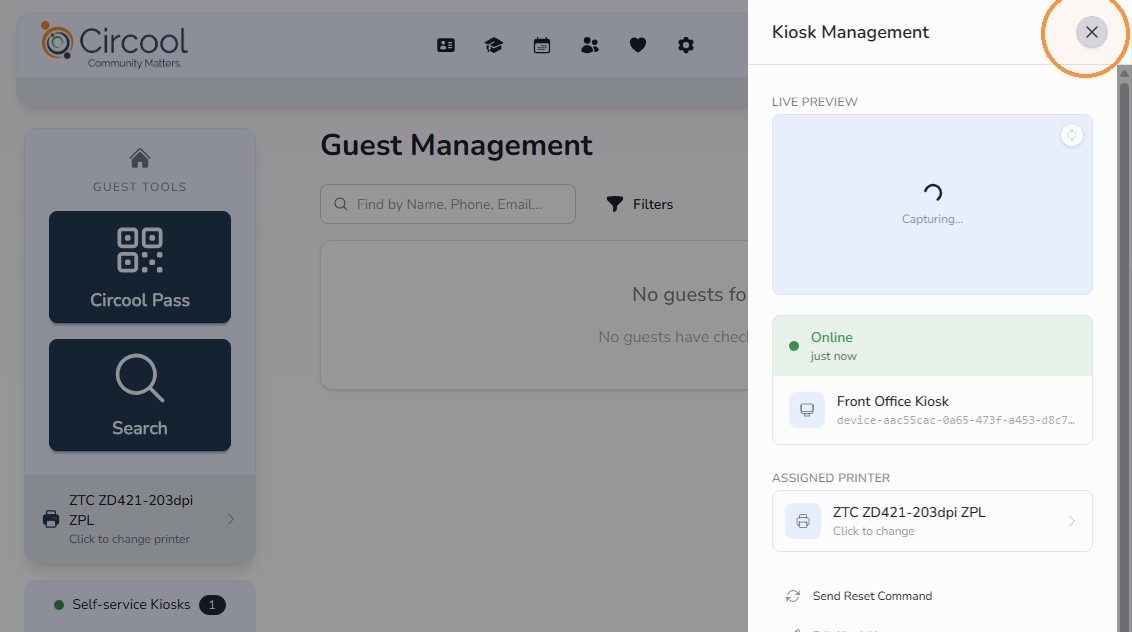
- Close the Kiosk Management panel.
What happens next
Your kiosk is now enrolled and connected to the selected badge printer.
If your school has multiple kiosks, repeat this process for each device.
Good to know: Multiple kiosks can print to the same name badge printer.
That’s it. Your self-service kiosk is ready to help guests check in, check out, and complete common Circool steps.
Need help?
Circool support is here to help.
If you need help enrolling a self-service kiosk or assigning a printer, contact Circool support by phone at 205.202.1124 or email support@circool.com.
Was this article helpful?
That’s Great!
Thank you for your feedback
Sorry! We couldn't be helpful
Thank you for your feedback
Feedback sent
We appreciate your effort and will try to fix the article